I’m in the process of deploying some internal databases and Griffeye services to remote examiners. There’s a lot of steps to doing this in a way that is both seamless and secure, so my goal is to document and share that journey as I work through a process of how to share a Griffeye Intelligence Database on a large scale to remote users not operating on the same local network.
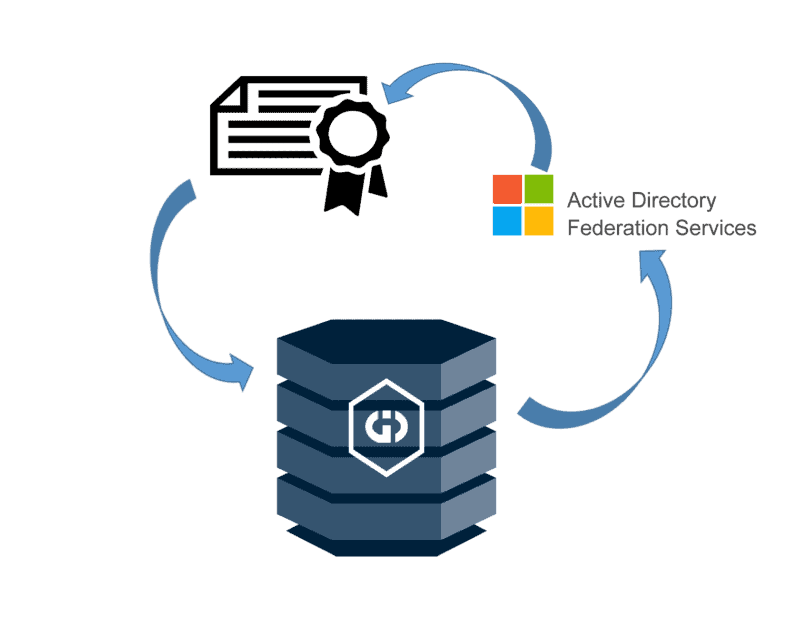
In this series of posts, I’ll be walking through the process to get an ADFS (Active Directory Federation Server) up and running on your domain by creating and configuring an internal Enterprise Certificate Authority for issuing and managing the ADFS SSL connections. The final goal of this process is to then configure a Griffeye Intelligence Database to leverage your organization’s active directory for managing individual user access and permission control within your GID.
There’s lots of other tutorials around ADFS, CA’s, etc. out there that offers great info. But the goal here is to pull together a bunch of disparate steps into one guide, and tailor things to integrations with a Griffeye GID.
Prerequisite:
Existing Active Directory Domain with Windows Server 2016 or higher available.
Admin access to your domain and domain controller.
ADFS Service Account Creation:
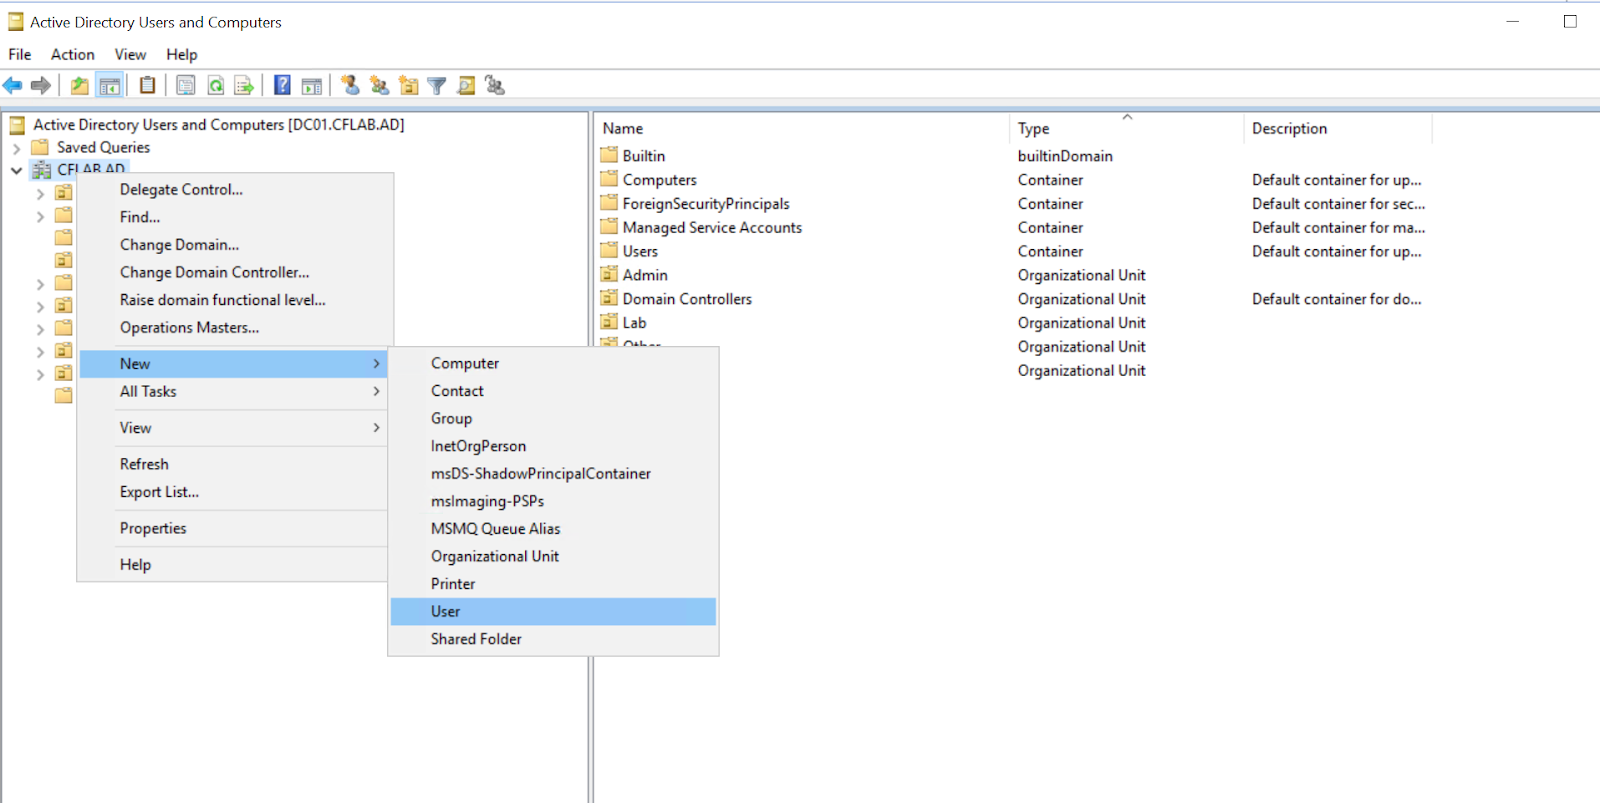
- Create an AD user account on a domain controller that ADFS associated services can run under.
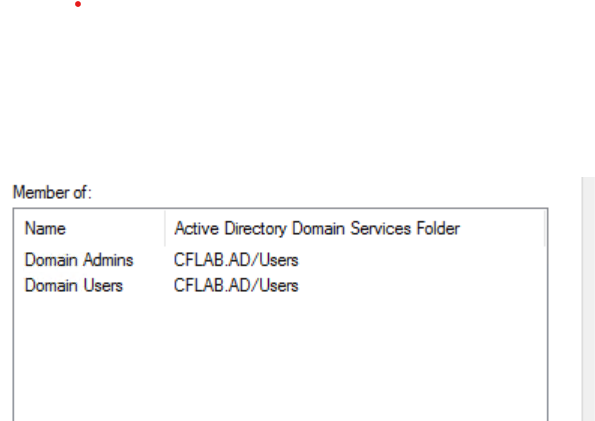
- Next this account must be placed in the ‘Domain Admins’ group membership in order to fully manage certificate services. This can be done by right clicking on the new ADFSSERVICE user, selecting ‘Properties’, then going to the ‘Member Of’ tab.
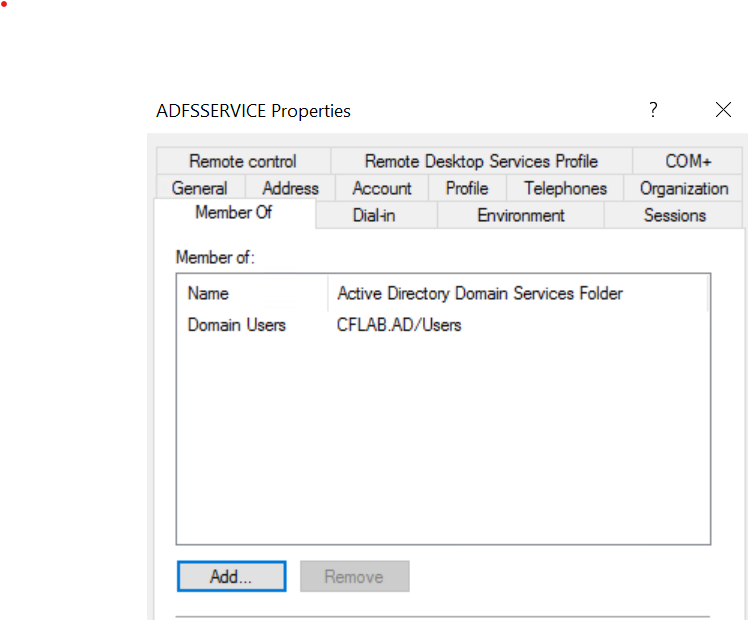
- Click ‘Add’, then enter ‘Domain Admins’ and click ‘Check Names’ to validate you correctly entered the group and click OK.
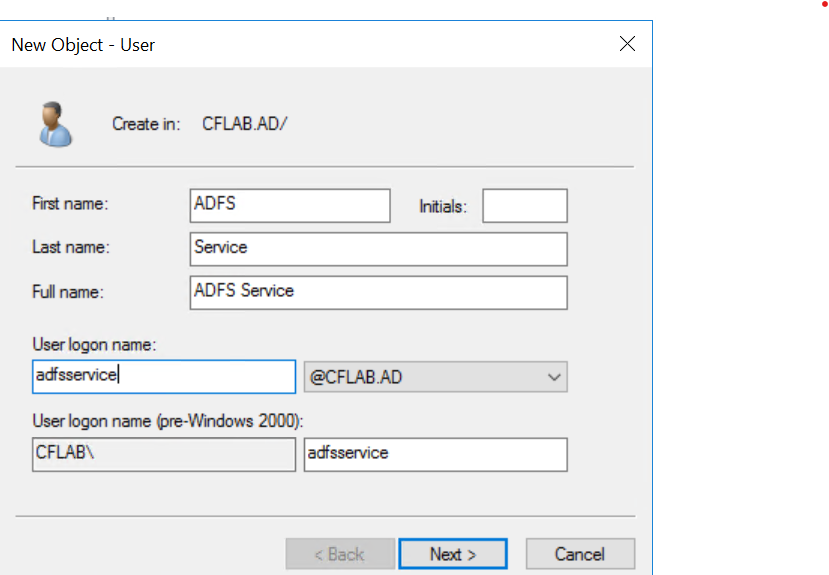
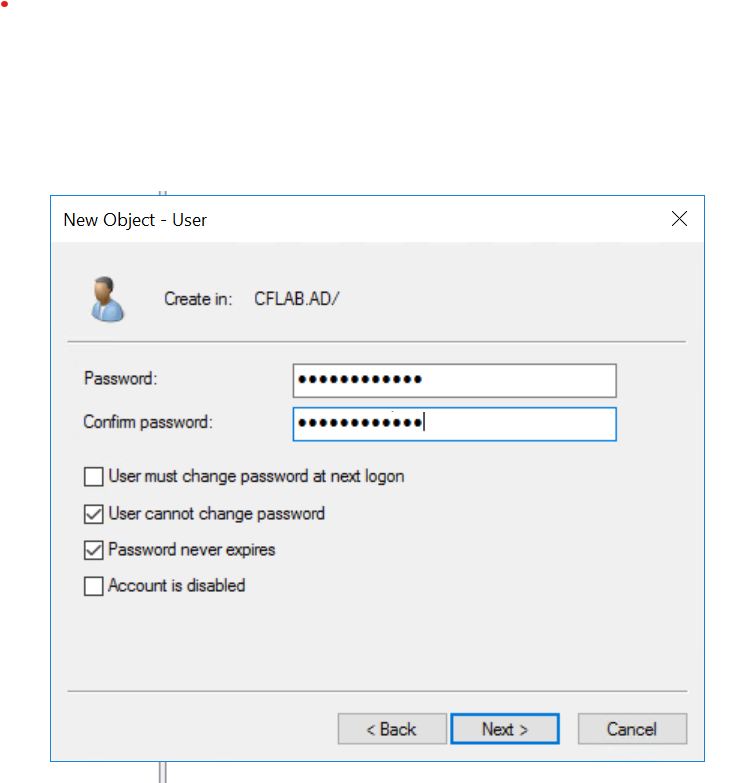
- Repeat the process one more time and make an additional ADFS Service Account but DO NOT give this second account ‘Domain Admin’ privileges. It can be left as a standard account. In this example we’ll name that account ‘ADFSUSER’.
Server Roles Setup and CA Setup
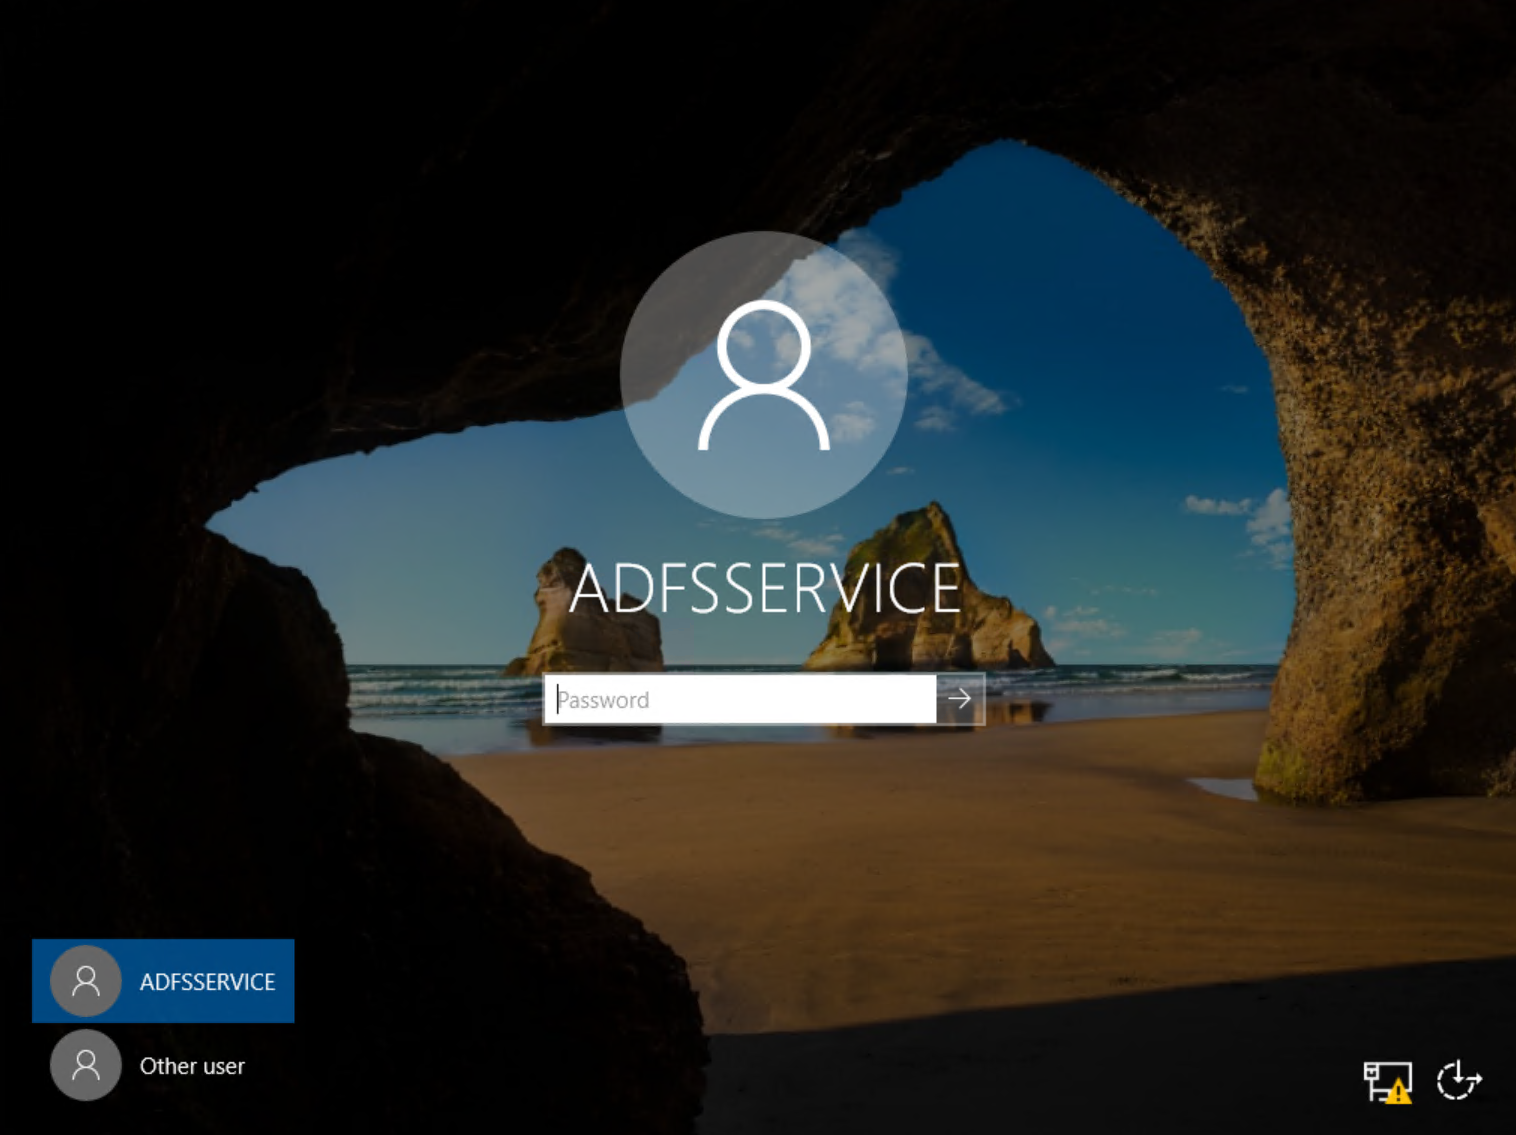
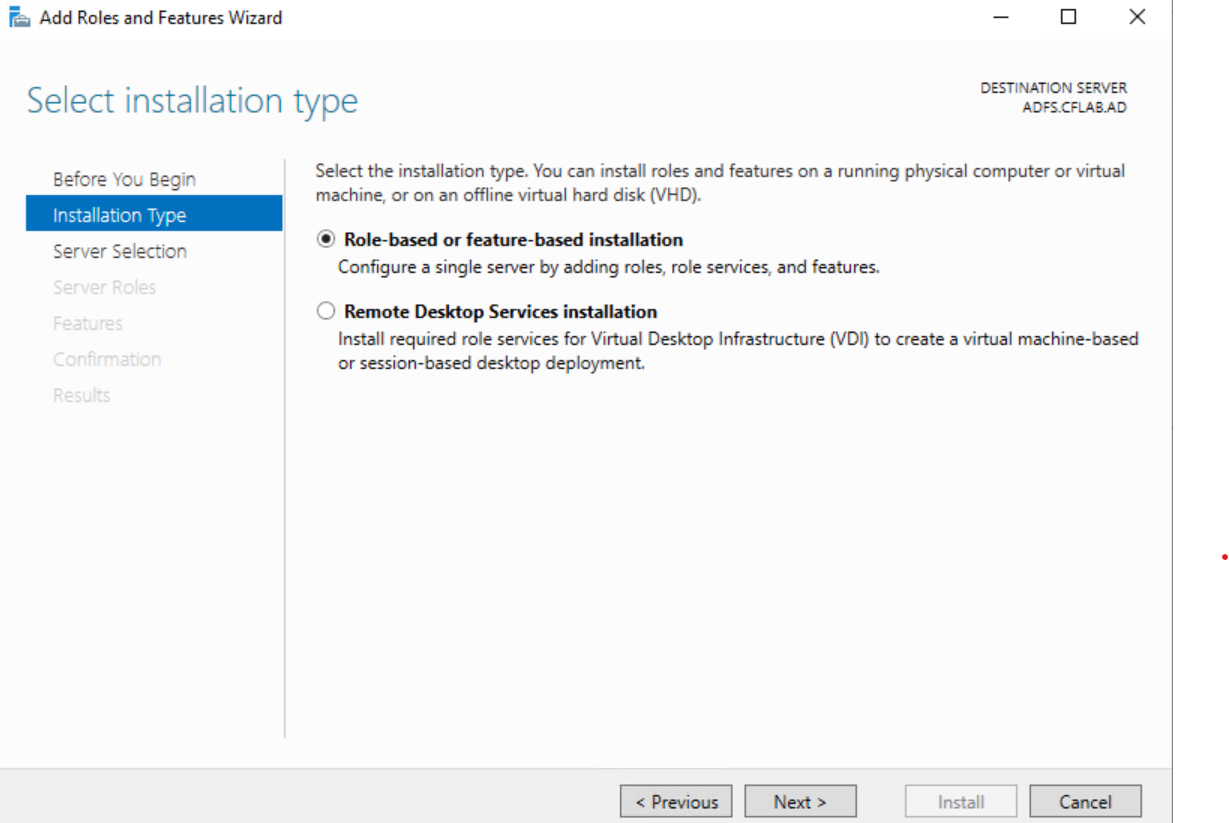
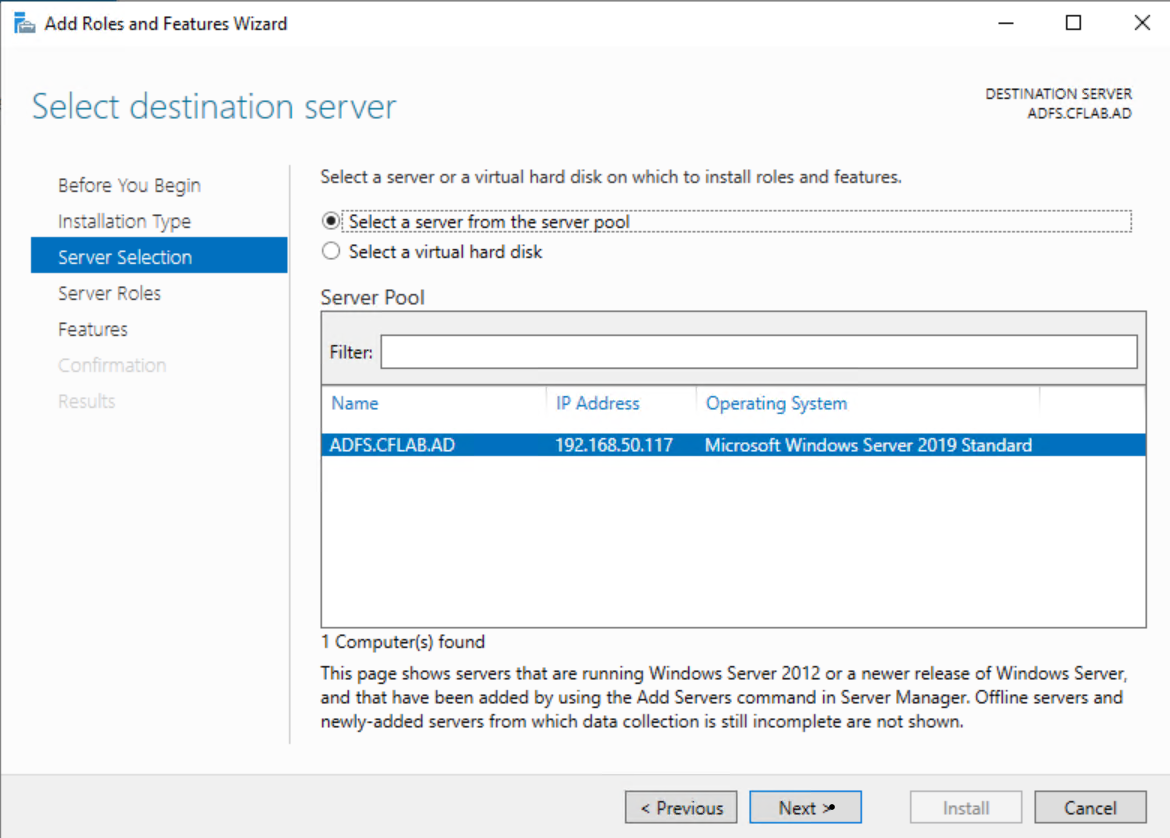
- Now, you must stand up a Windows Server Instance and login using ADFSSERVICE account just created. In the provided example we provisioned a standalone VM running Windows Server 2019 that will be solely used to run Microsoft ADFS and Certificate Authority Services required to get ADFS running. Installing this on a standalone OS install is not required and could technically be installed on any Windows Server installation within your AD environment. However, I prefer to segment these types of services keep it separate from on my domain controller.
- From the Windows Server Manager we now need to install a couple of option roles/features.
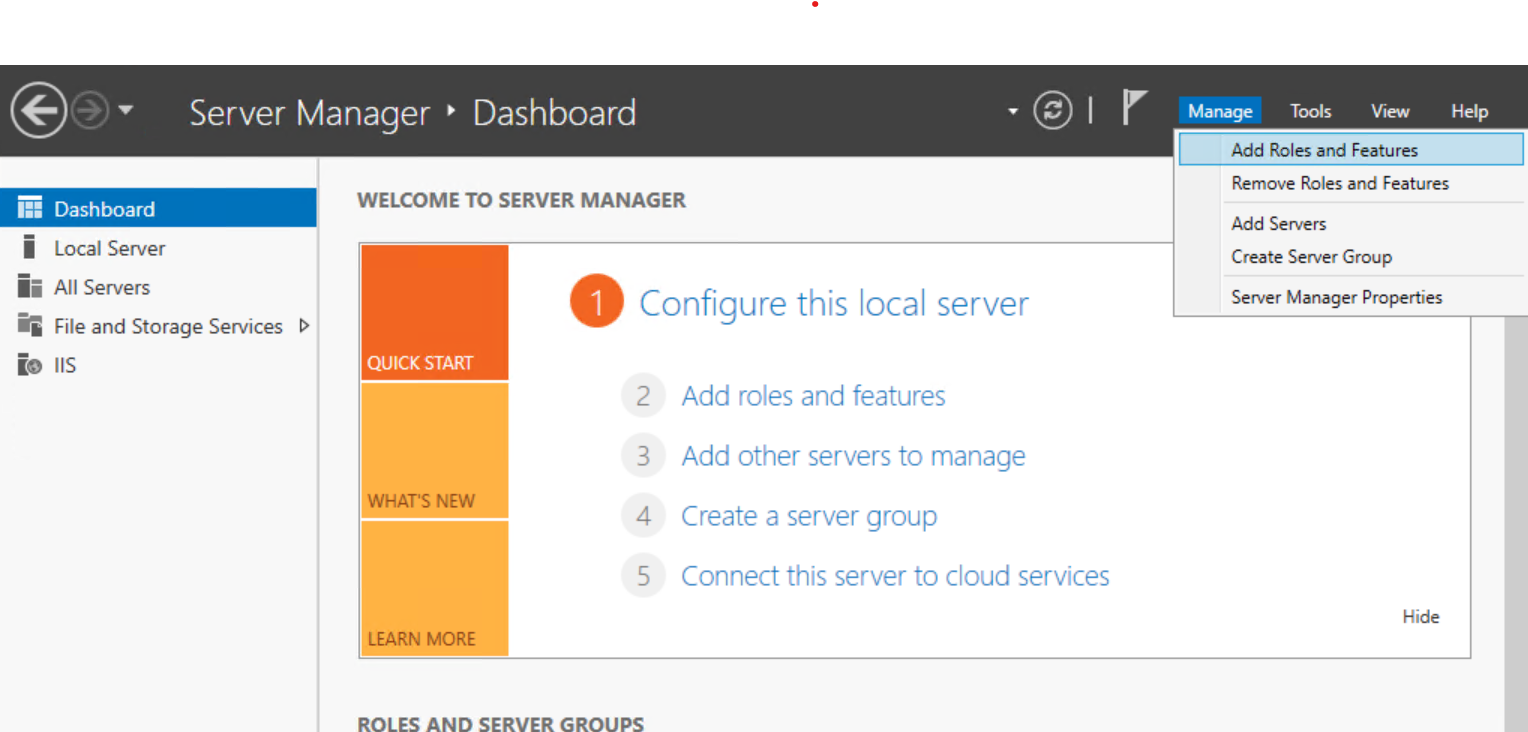
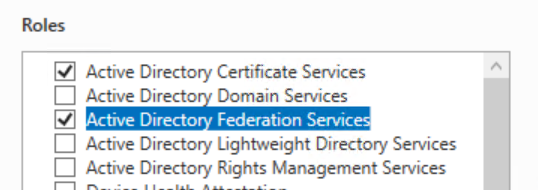
- Select ‘Active Directory Certificate Services’ and accept default options.
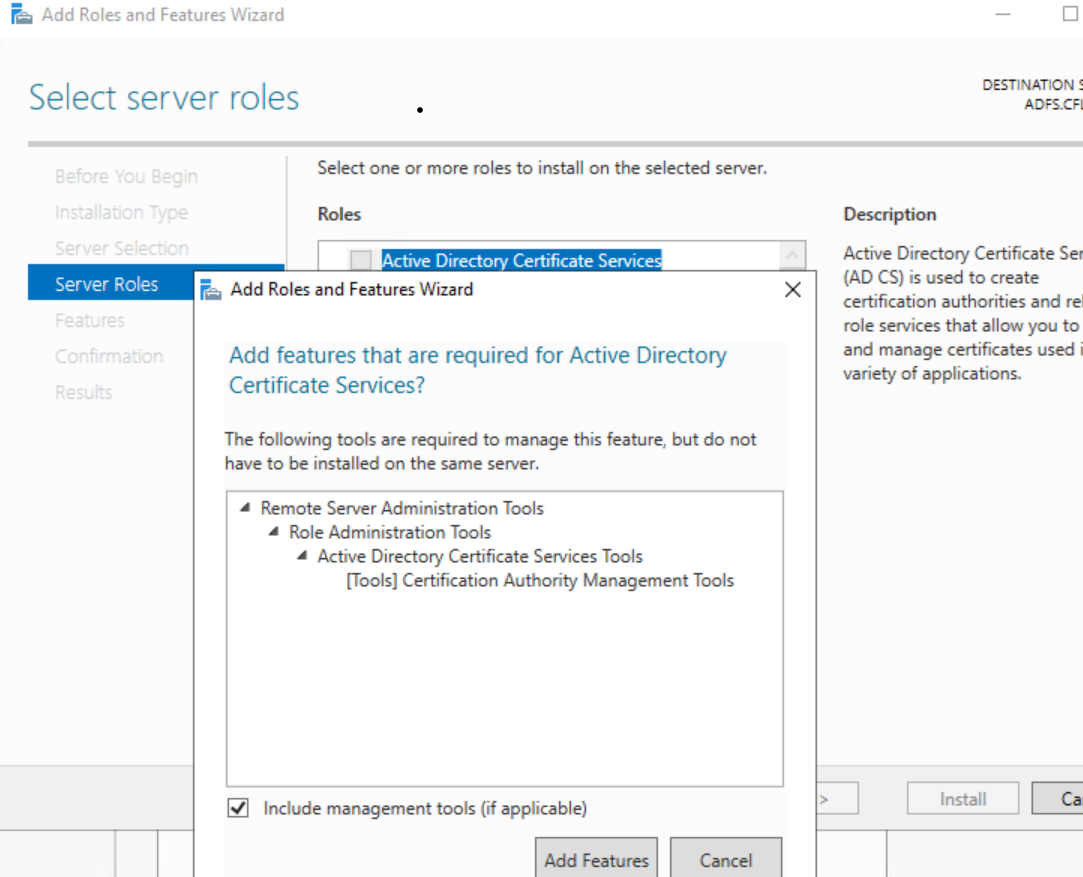
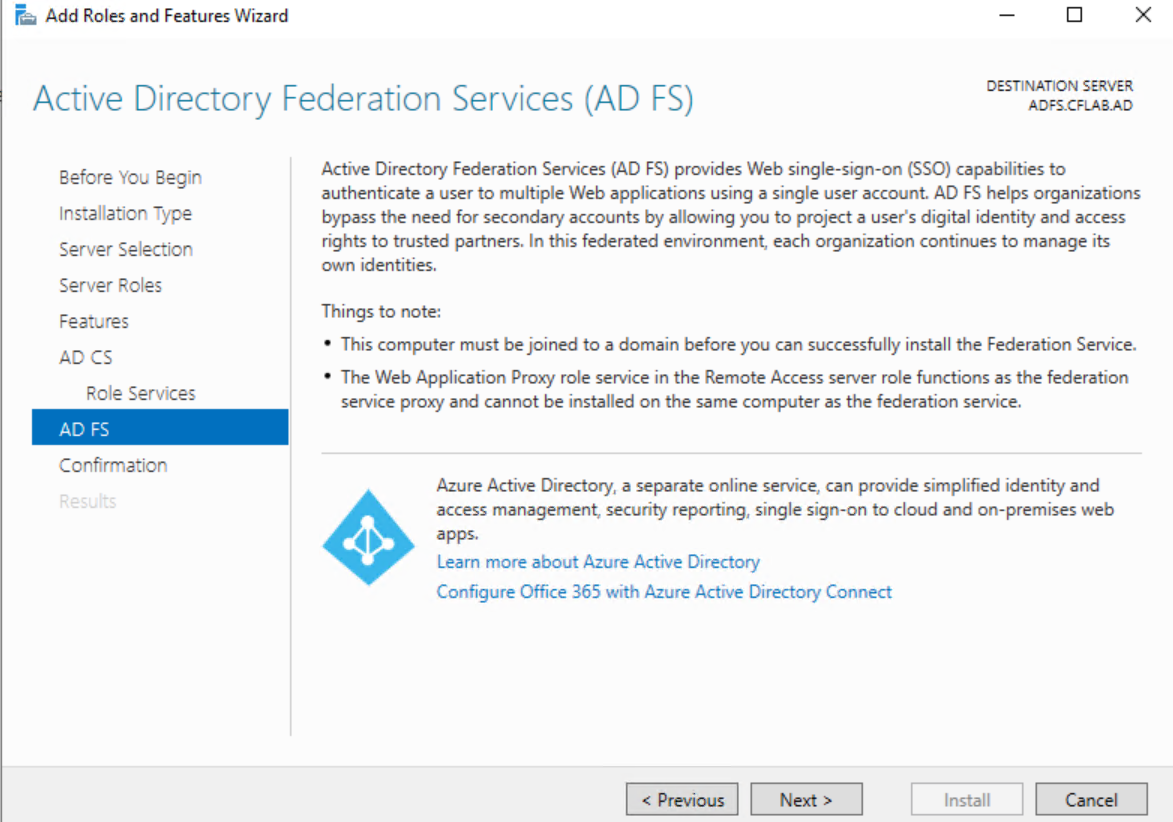
- Select ‘Active Directory Federation Services’.
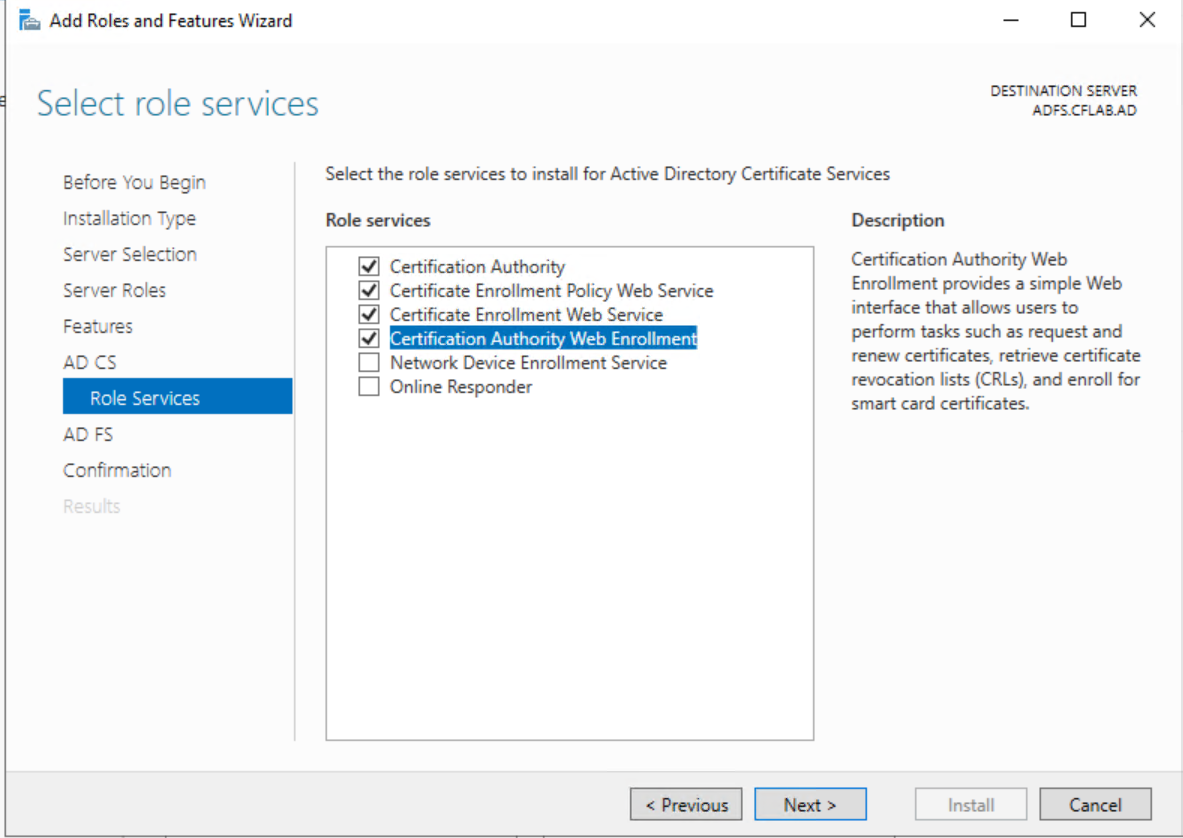
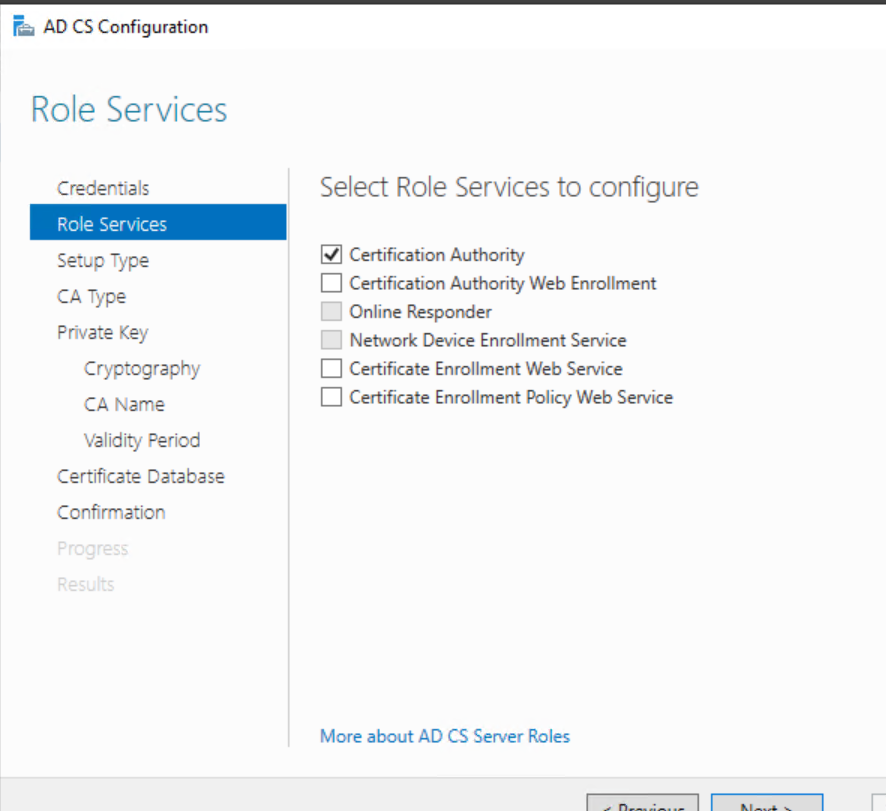
- Click Next until you get to the ‘Role Services for Active Directory Certificate Services’ page. We’re going to check the following 4 options. At minimum you’ll need to select ‘Certification Authority’.
- Proceed past the next screen reminding you of what ADFS is and that it needs to be installed on a AD Joined computer.
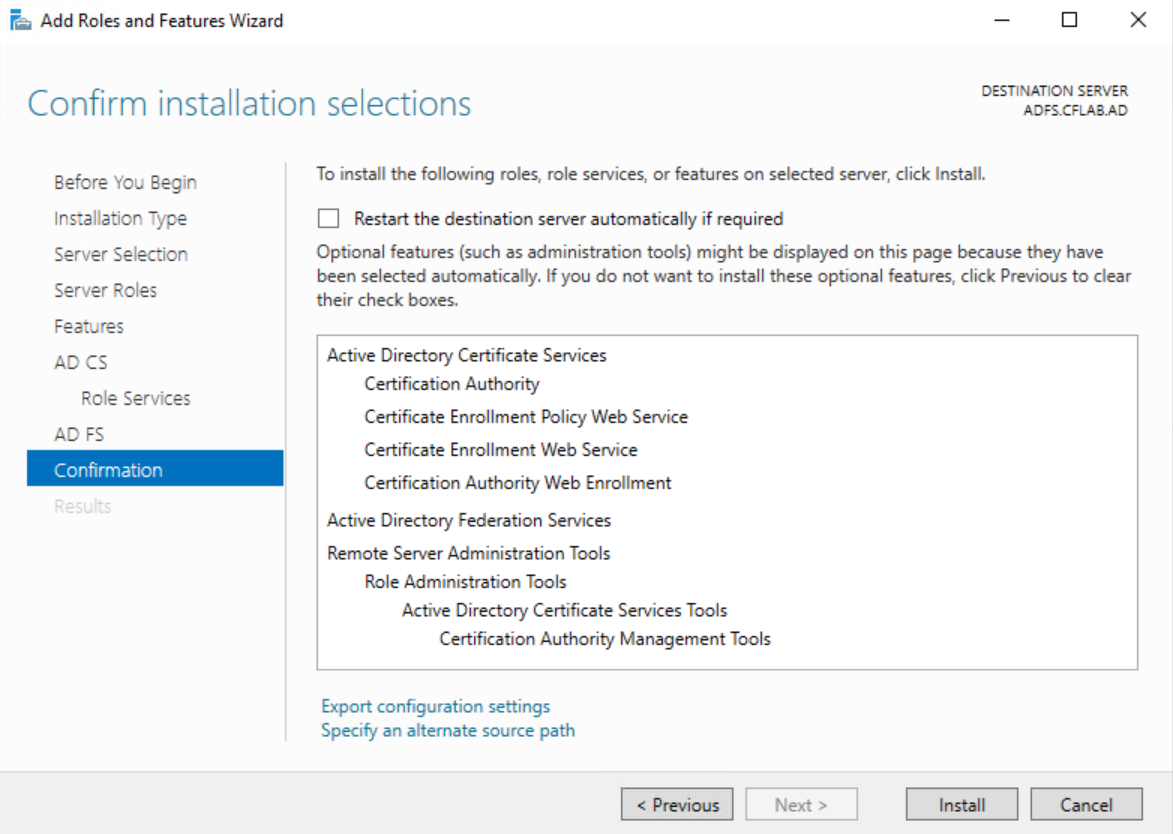
- Confirm the Roles/Services being installed and click ‘Install’.
- Once finished you should get a confirmation stating the roles were installed successfully and are awaiting additional configuration. A restart should not be required. However I recommend running a reboot before proceeding to the next configuration steps.
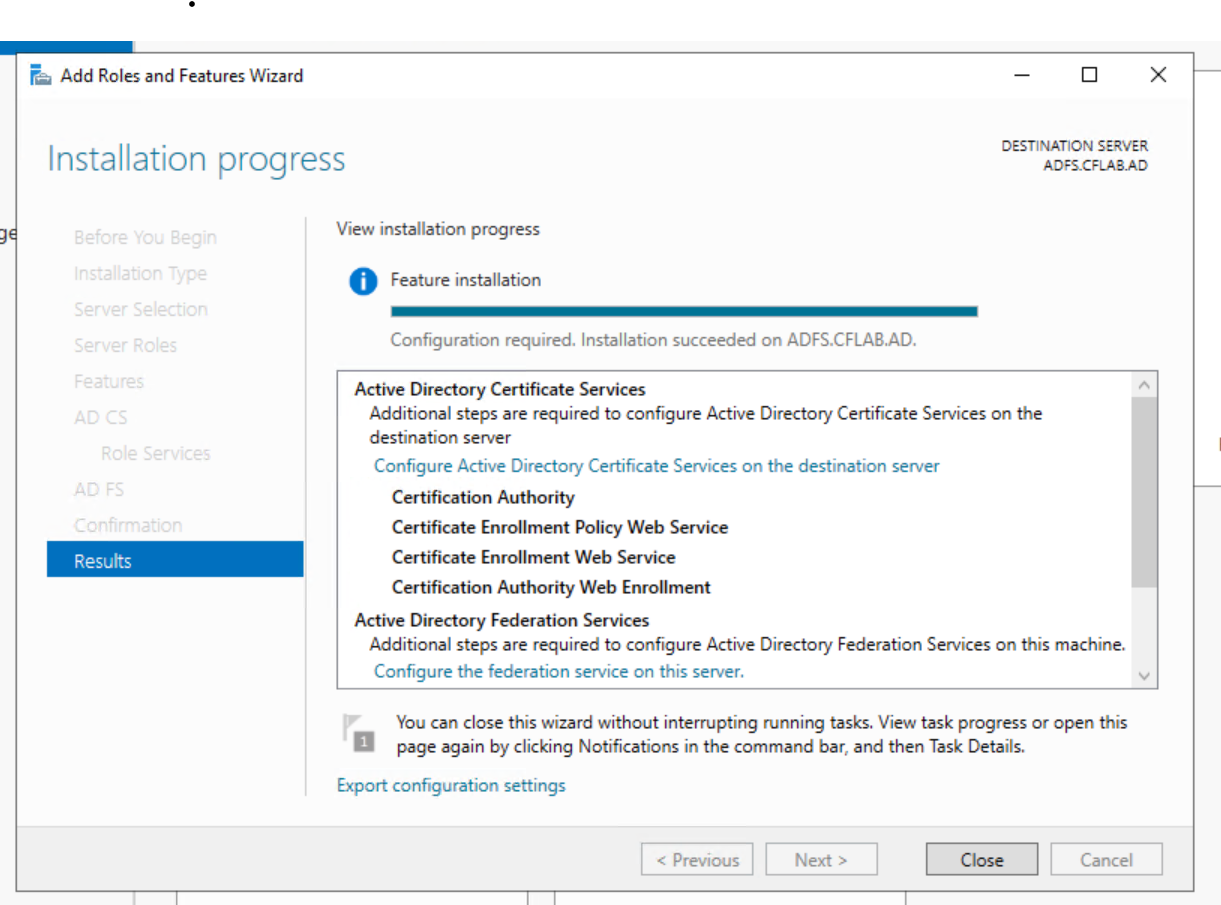
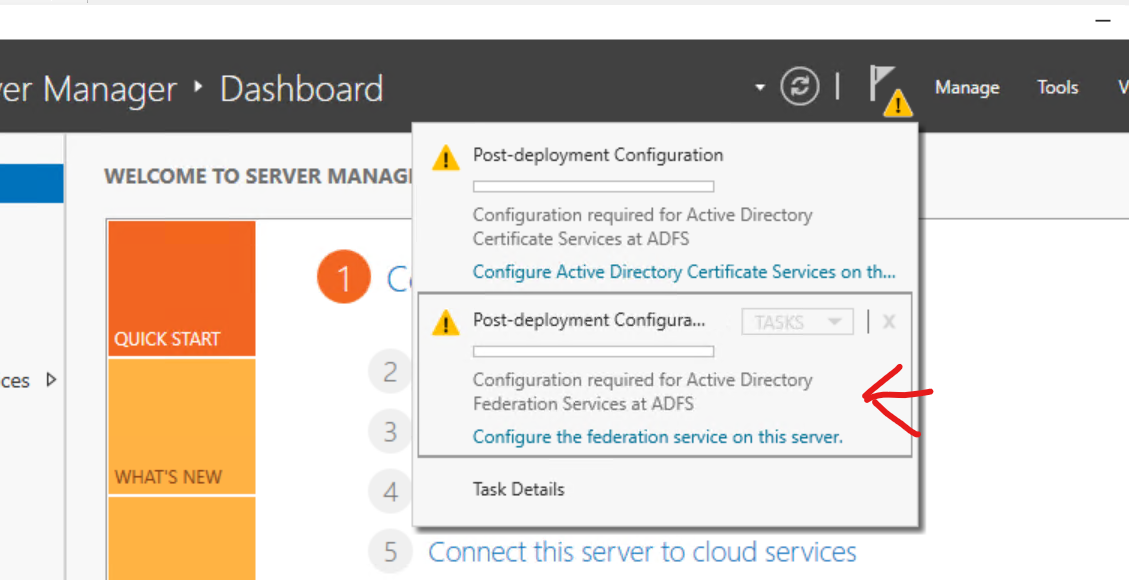
- Following the reboot head back into the Server Manager Dashboard and you’ll note that there’s two new notifications letting you know that the Certificate Authority and ADFS requires additional configuration.
Certificate Authority Configuration
- First Click on ‘Configure Active Directory Certificate Services”
- On the first screen click ‘Change’ for the credentials the Certificate Service will run under and specify the service ADFS service account AD user you created earlier.

- Click next and now check the box for ‘Certification Authority’ to configure it.
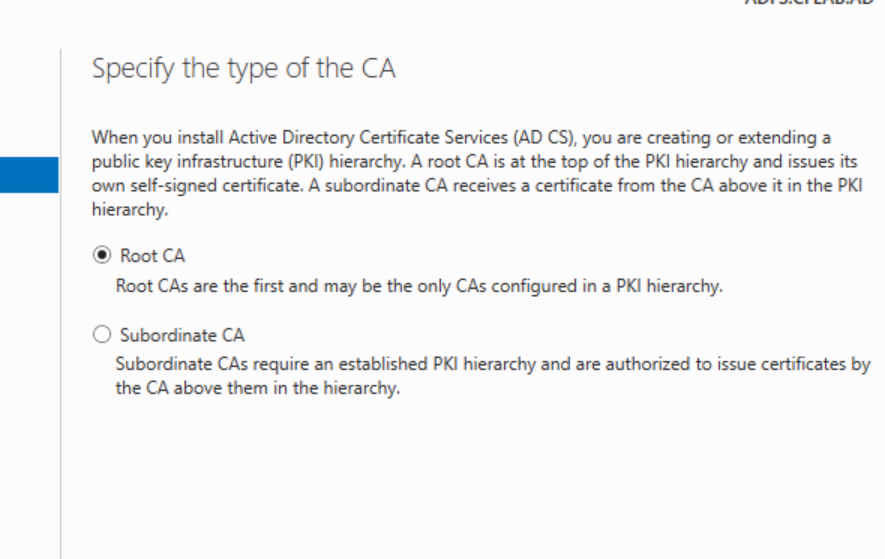
- Select ‘Enterprise CA’ if this is the first and primary certificate authority service on the network. In this example there is not another existing CA, so we will use ‘Enterprise’.

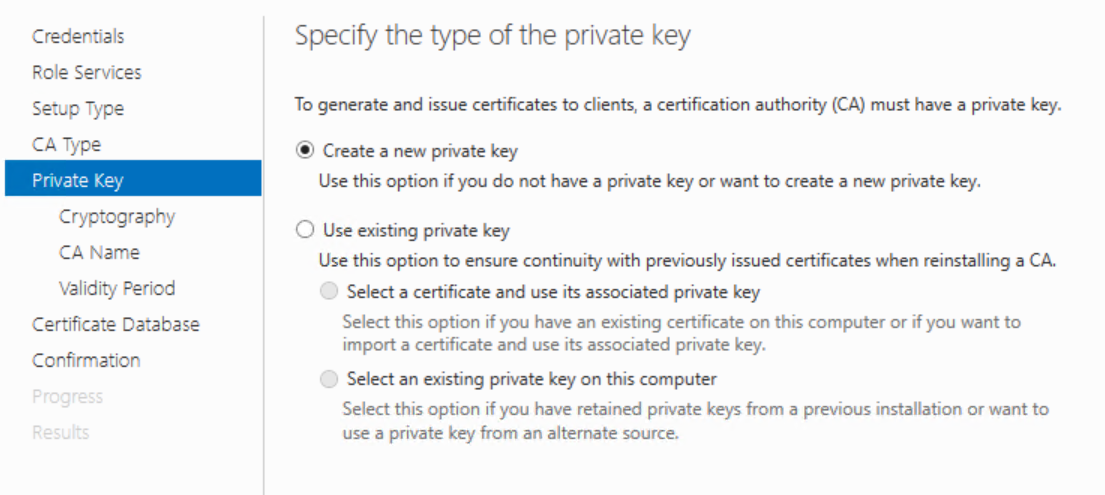
- Select ‘Root CA’, and Select to generate a new private Key.
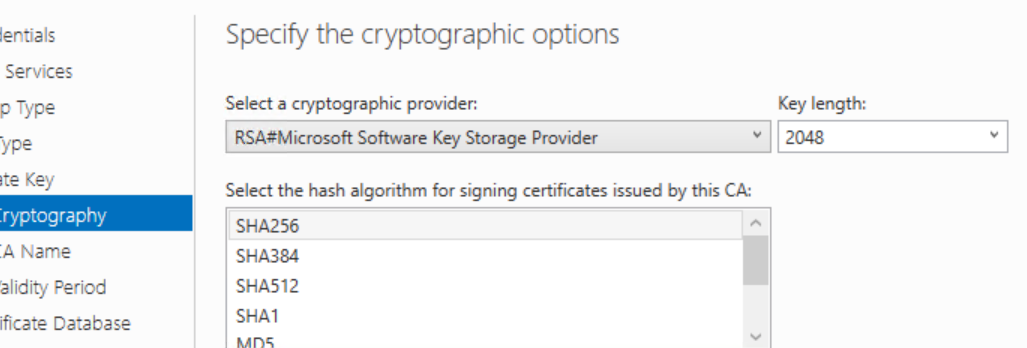
- Next you have the option to specify your cryptographic key size and hash algorithm. We’ll just use the default 2048 length, and sha256 options and select next.
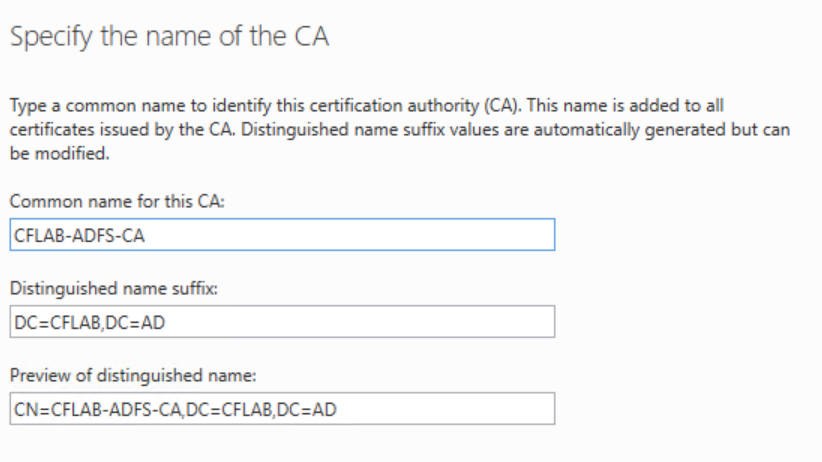
- Now you can specify the common name value that will be used for issued certificates. The value autofill to [domainname]-[computername]-CA. This will work fine and we’ll click next.
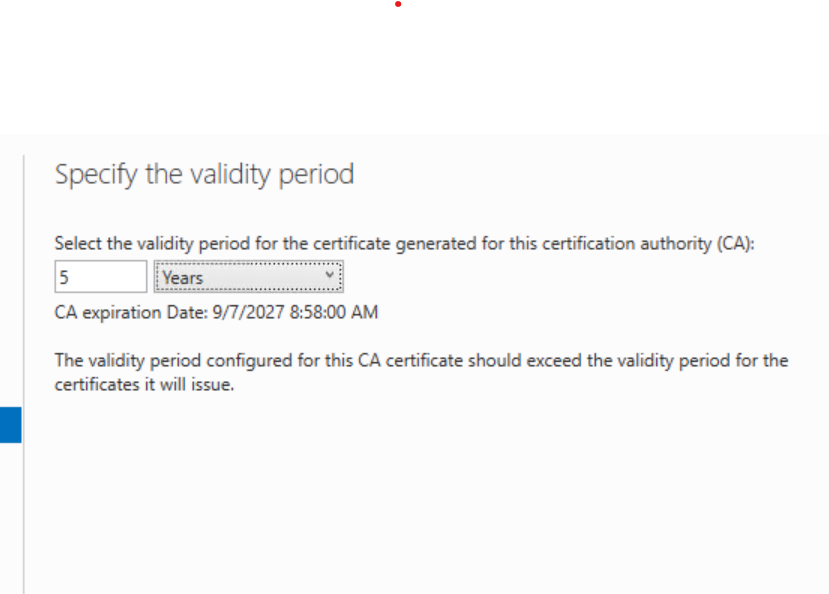
- Next you must specify the validity period for your root CA certificate which defaults to 5 years. You can expand this or contract to whatever you want based on your personal security policies and how often you are willing to reconfigure any affected services when the root CA certificate must be renewed. We’ll use the default 5 years in this example.
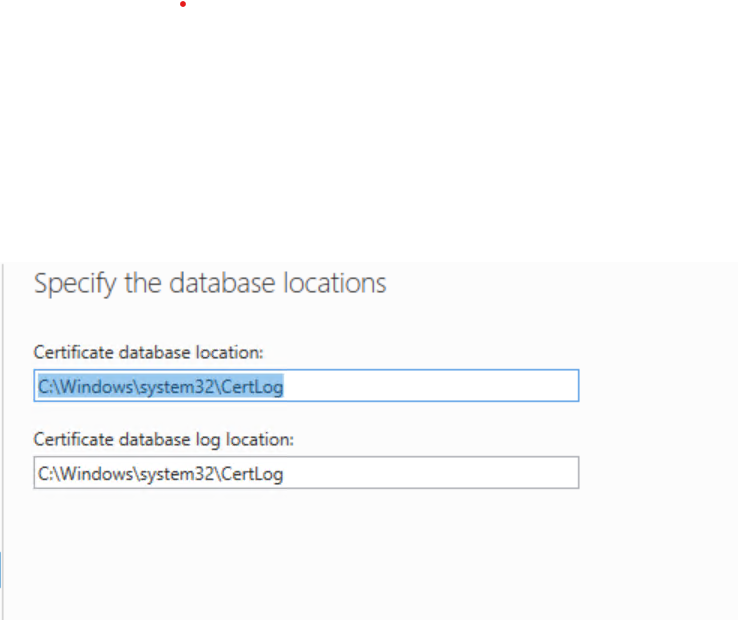
- Specify the location or except the default locations for where the certificate databases will be stored and click next.
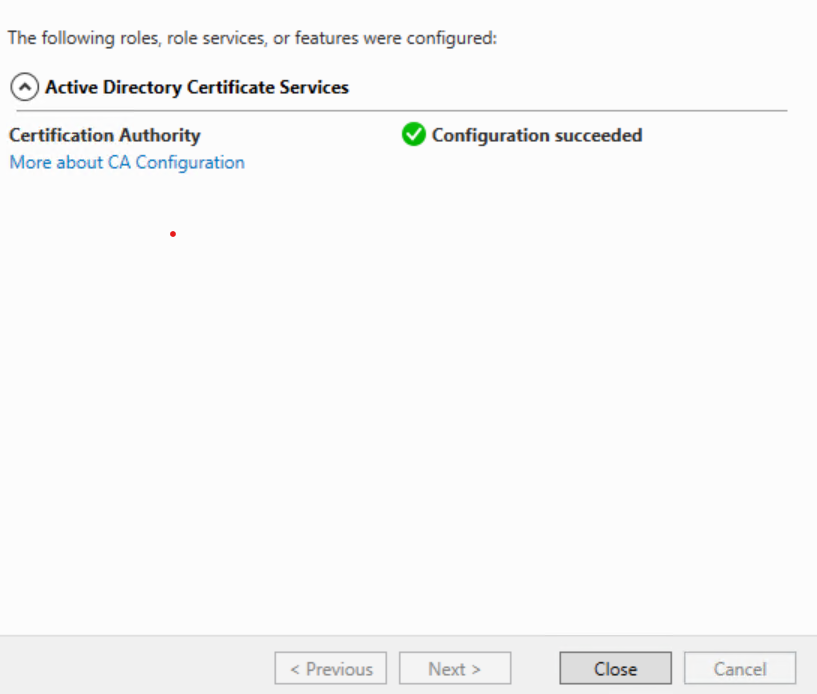
- Confirm the settings on the next screen and if things look good click ‘Configure’. After a moment if things went well you should receive a ‘Configuration Succeeded’ message and you can close the window.
ADFS Certificate Template Setup
Next, before we can configure ADFS, we must generate a certificate using the newly installed Certificate Authority. We will need this certificate during the ADFS configuration.
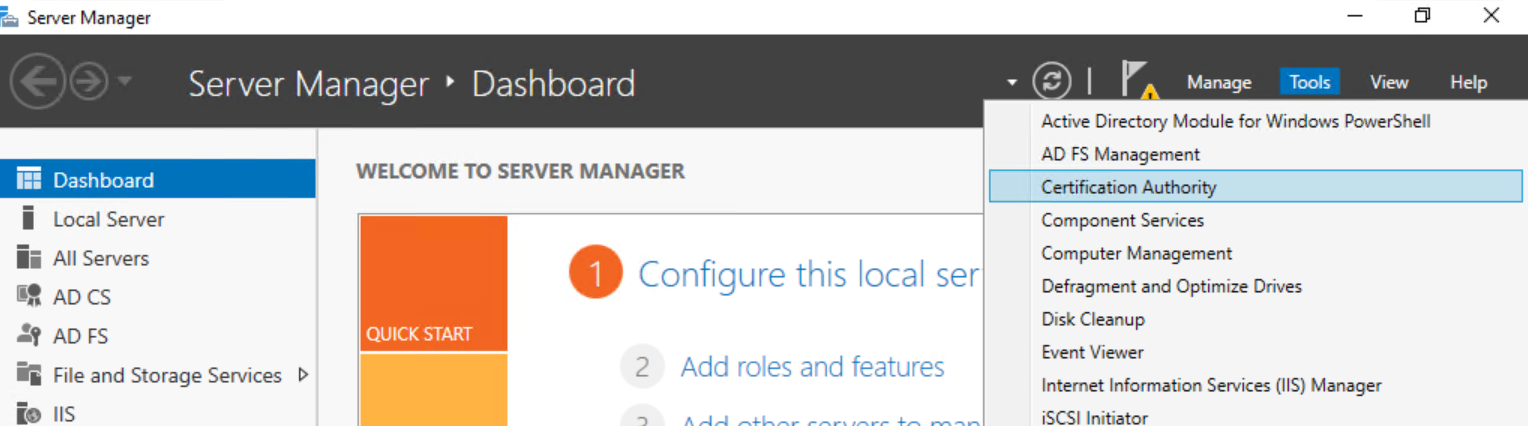
- From Server Manager Click, ‘Tools’, and ‘Certificate Authority’.
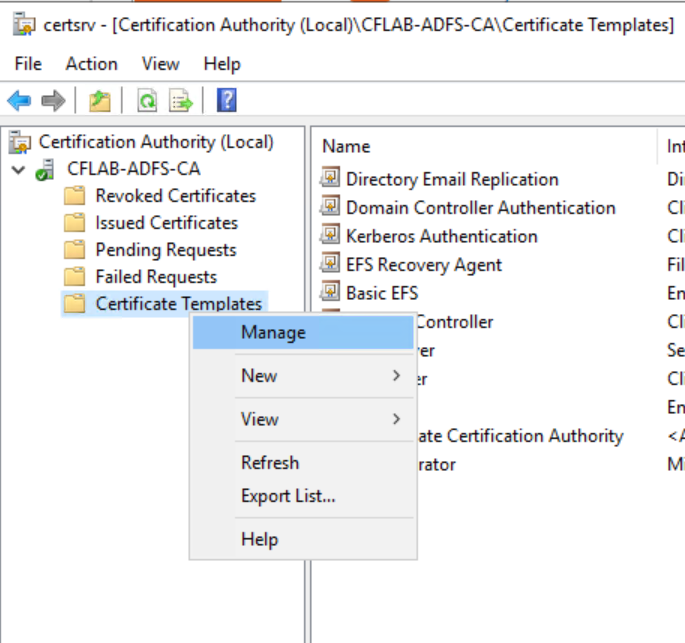
- Within the Certificate Authority window, expand the newly created certificate authority, right-click on ‘Certificate Templates’ and click ‘Manage.
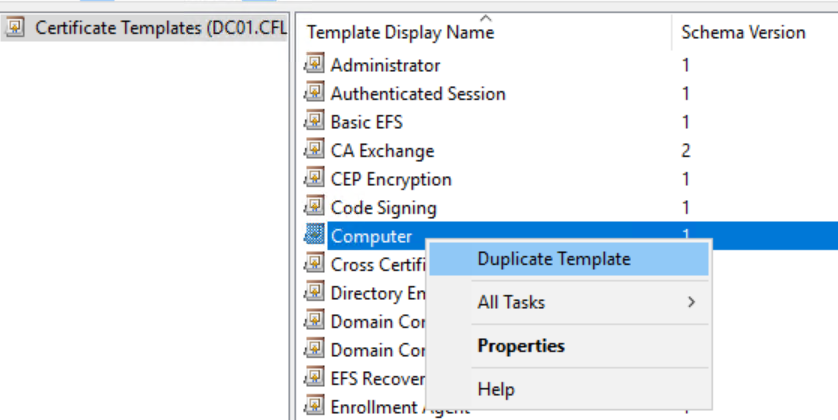
- This will open the ‘Certificate Templates Console’. Locate the ‘Computer’ template in the right pane and click ‘Duplicate Template’.
- A new window for the properties of the new template will open. Click on the ‘General’ tab and give the certificate template a unique name, and under Validity period adjust certificate validity years as desired. Finally, check the box for ‘Publish certificate in Active Directory’.

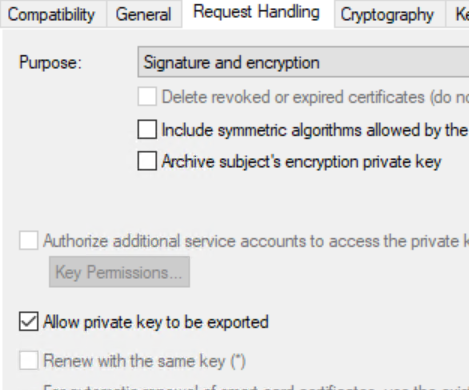
- Next go to the ‘Request Handling’ screen and check the box for ‘Allow private key to be exported’.
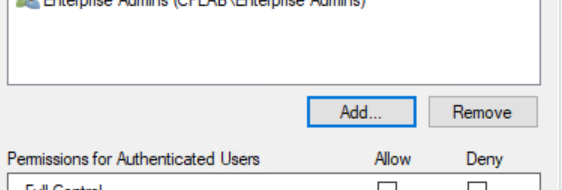
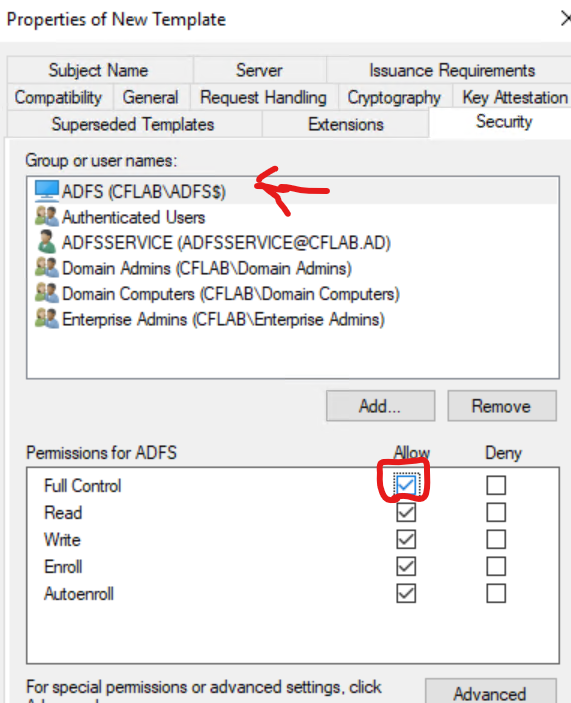
- Now go to the ‘Security’ tab. Here we need to add permissions for the ADFS server computer that we will be installing ADFS on.
Click ‘Add’
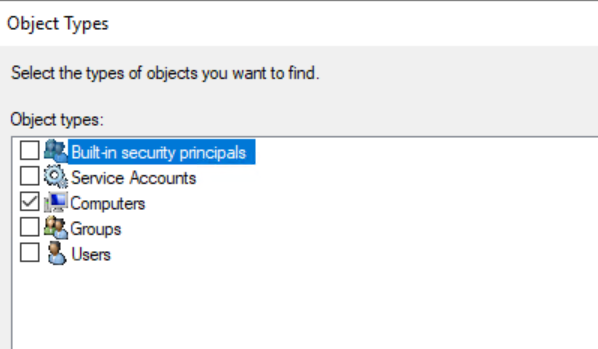
Click ‘Object Types’, check ‘Computers’, and click ‘OK.
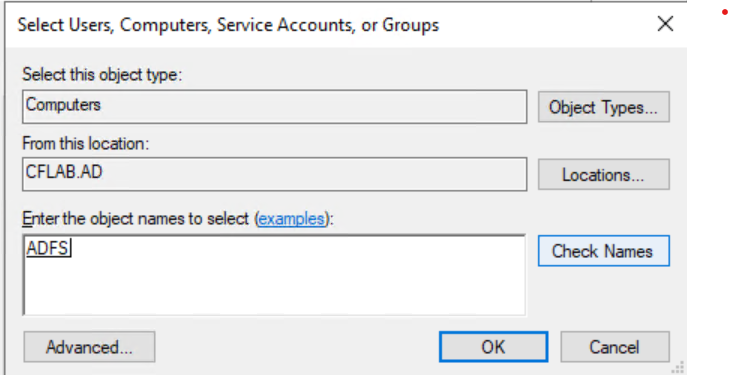
Now enter the hostname of the computer you’re installing ADFS on and click ‘Check Names’ to confirm, and click OK if validated.
Select the ADFS computer, and give it “Full Control”.
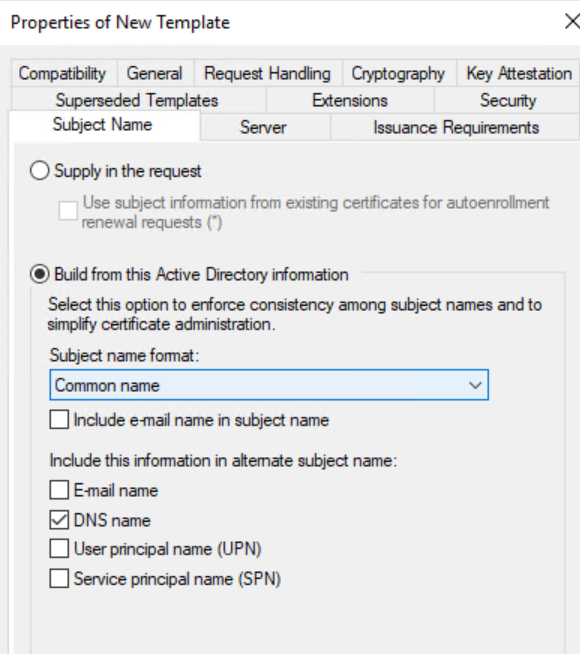
- Next Click the ‘Subject Name’ tab. Click ‘Subject name format’ dropdown. Select ‘Common Name’. Click ‘Apply’, and ‘Ok’ to close the window.
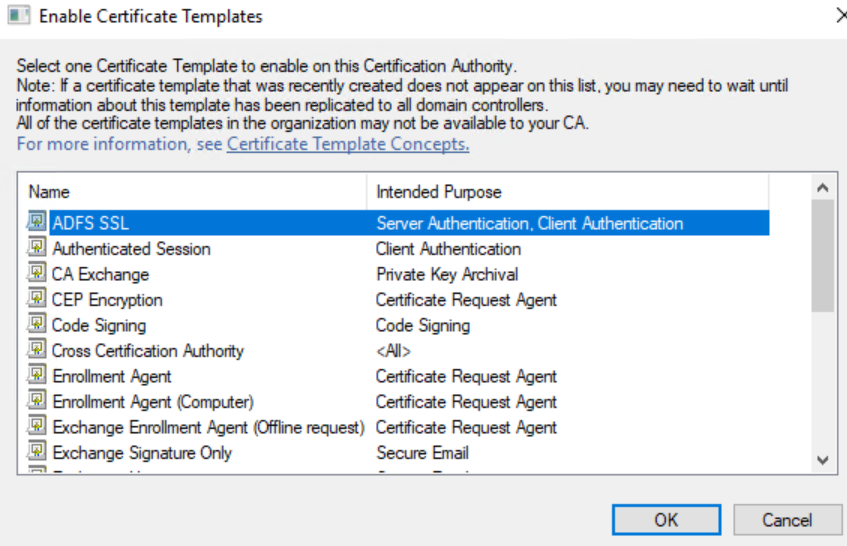
- Now return to the ‘Certificate Authority’ window. Right click on ‘Certificate Templates, Click ‘New’, and ‘Certificate Template to Issue’.
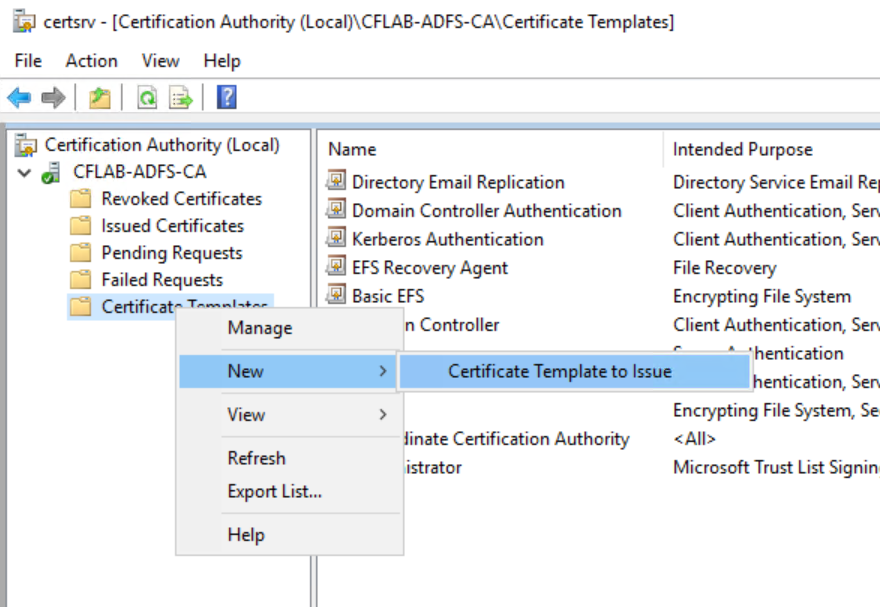
- In the window that opens select the newly created ADFS SSL certificate template you made a moment ago and click ‘OK’.
ADFS Certificate Generation
Now that we have the certificate template configured we’ll use the Certificates Snap-in Console to generate the actual certificate we’ll be using.
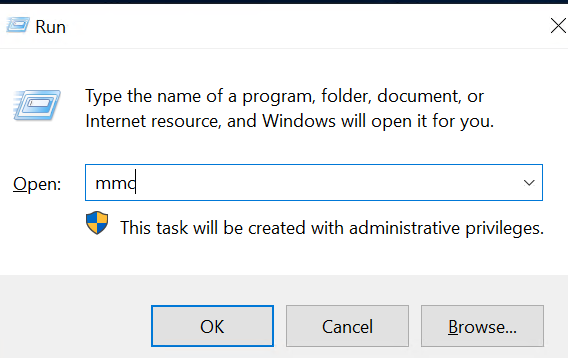
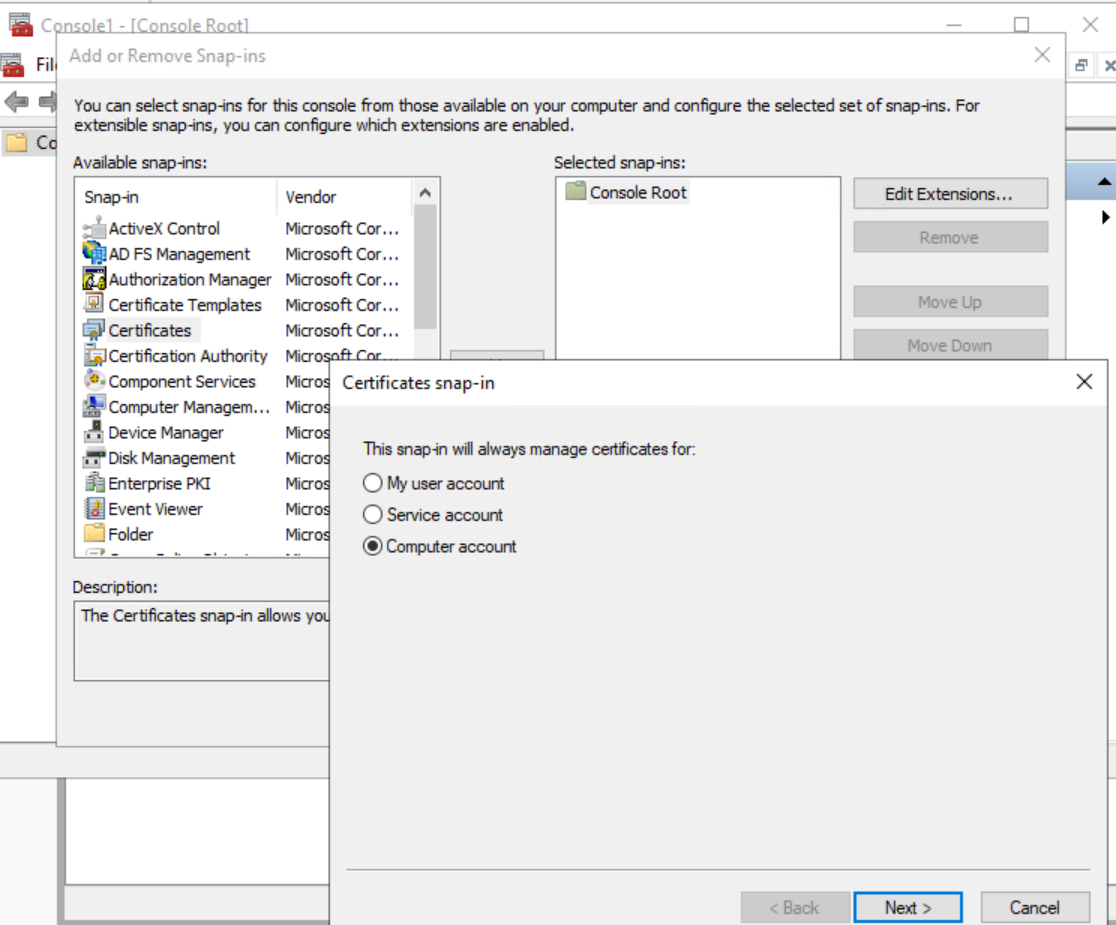
- Open the Windows ‘Run’ window and launch ‘mmc’.
- Go to File, Add Snap-in, and Select ‘Certificates’ from the ‘Available Snap-ins’. Select the option for ‘Computer Account’. Click ‘Next’, select Local Computer, and click ‘Finish’, then Ok to add the Snap-in.
- Expand ‘Certificates’, Select ‘All Tasks’, and ‘Request New Certificate’.
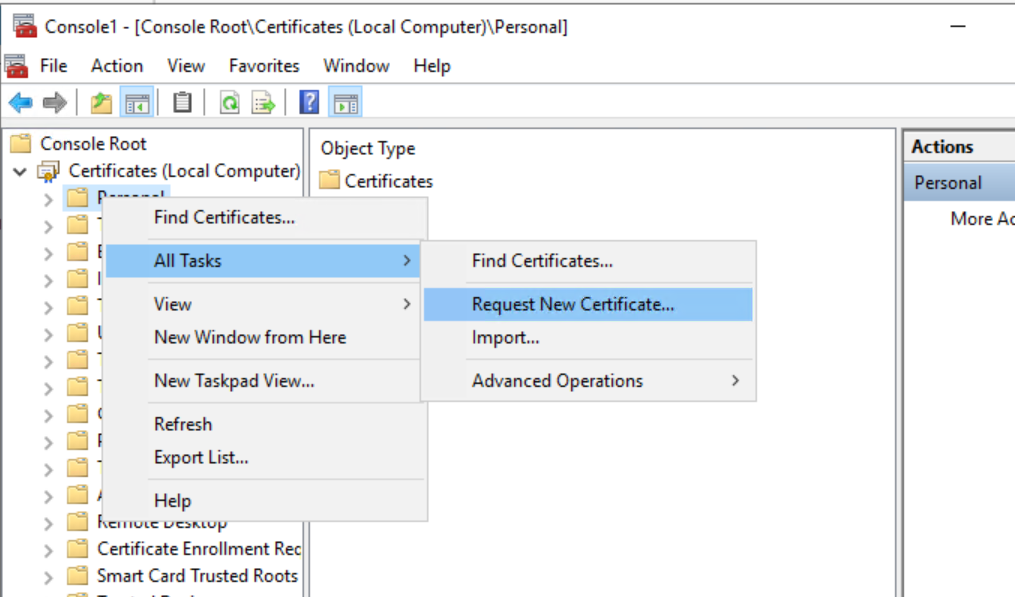
- Click ‘Next’ on the first window and then select the newly created ADFS SSL certificate and select ‘Enroll’.
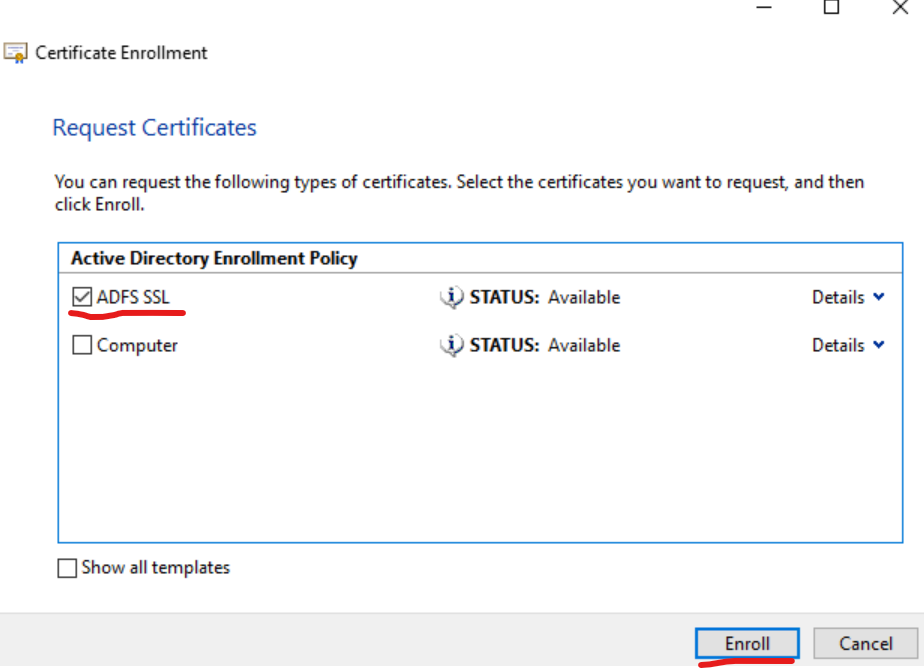
- You should now have a certificate available under ‘Personal’, and ‘Certificates’.

We’re now ready to configure the previously installed ADFS service with the newly generated certificate.
ADFS Configuration
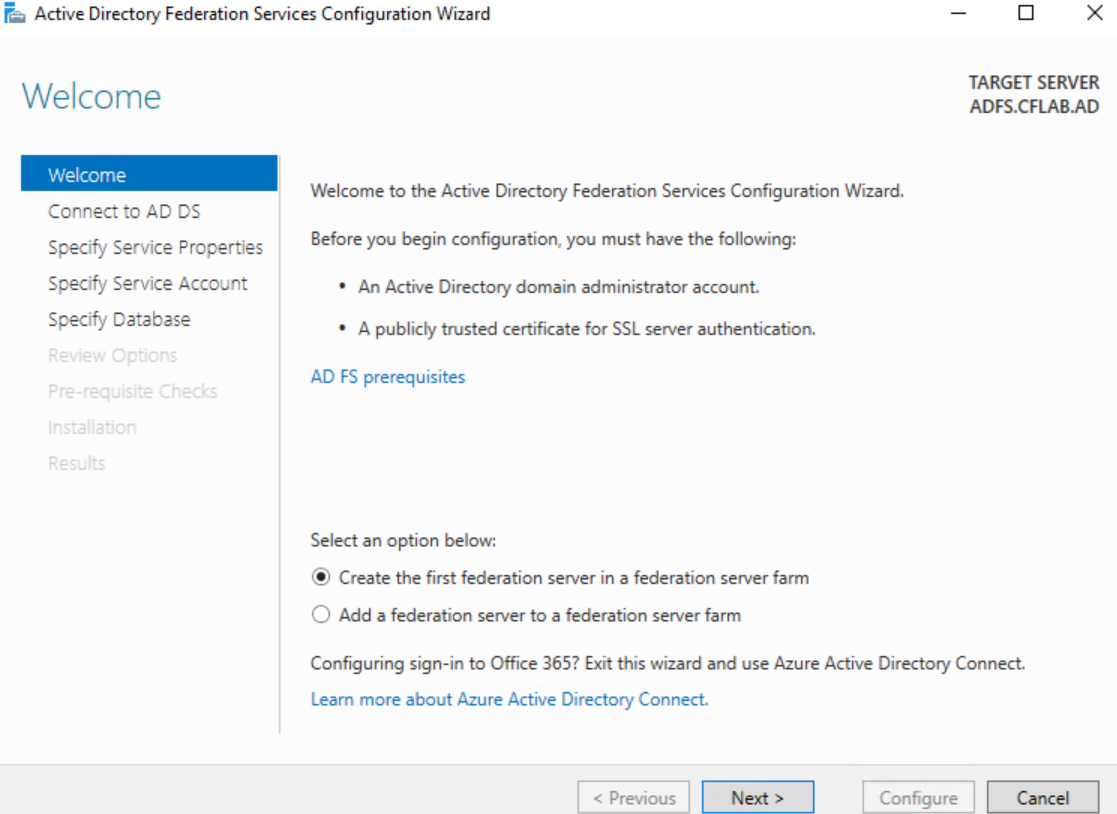
- Open the Server Manager Dashboard. Click on the pending notifications and select ‘Configure the federation service on this server’ option.
- Select the first option to ‘Create the first federation server in the federation server farm’, assuming this is the first time you’ve installed ADFS in your domain.
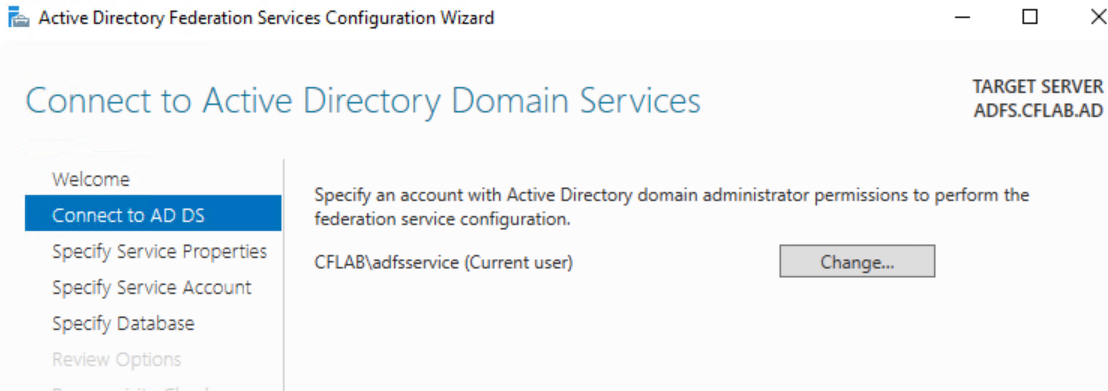
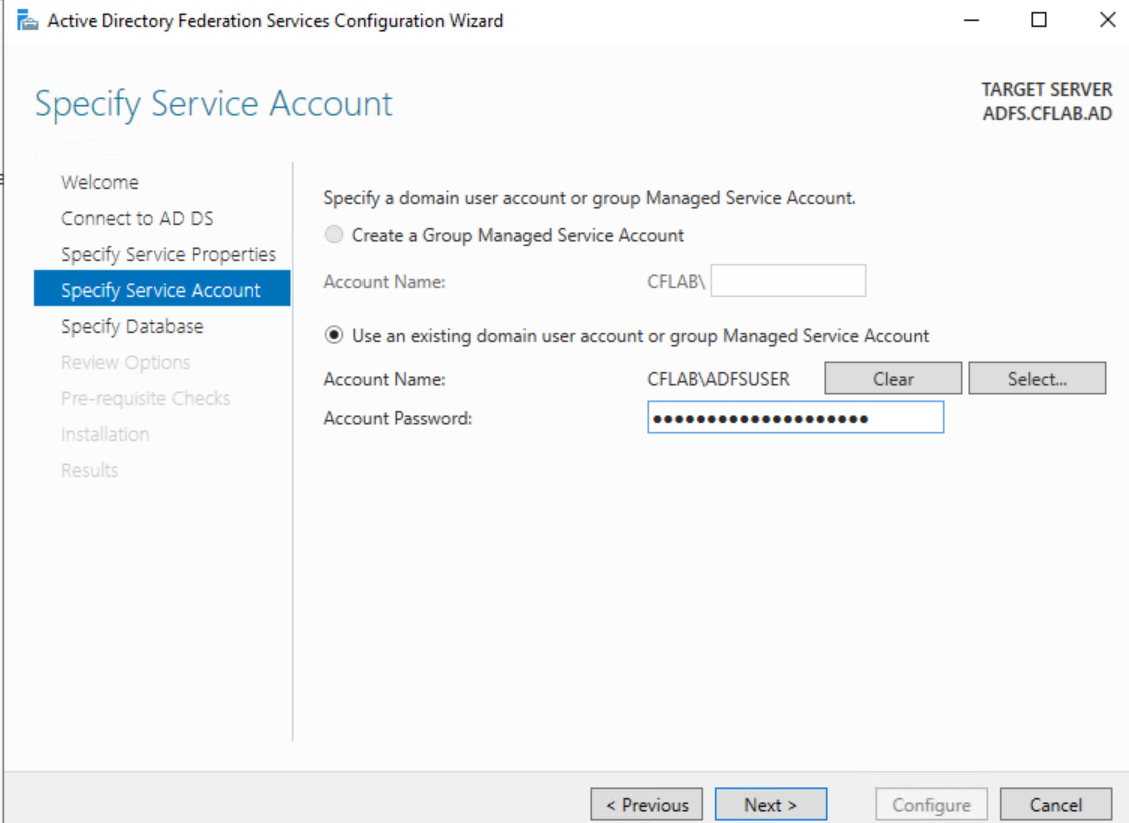
- Now ensure the adfsservice account you created earlier is selected as the account to run ADFS under. If not select the ‘change’ button and designate the appropriate service account. Click ‘Next’.
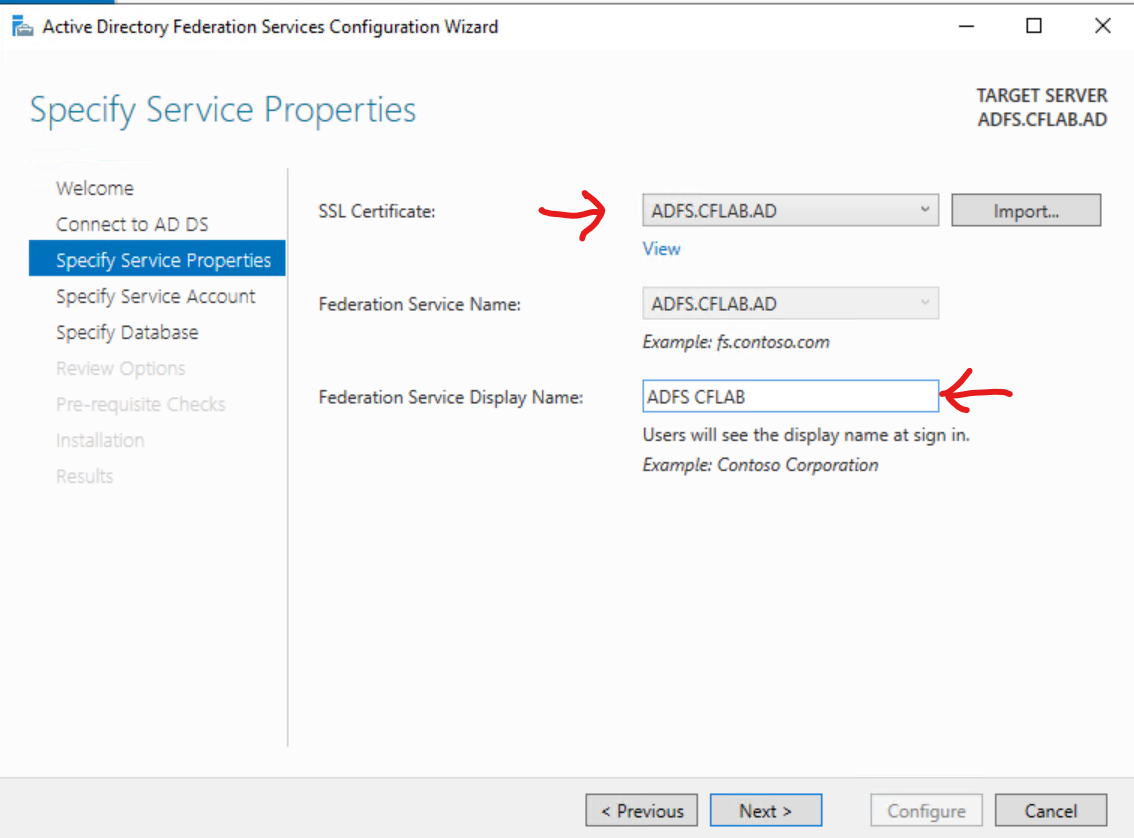
- Select the previously created SSL Certificate from the dropdown. Under display name, enter an identifiable Display name that will appear at the top of your organizations login when applications such as your GID authenticate against this ADFS server.
- On the next screen you need to designate the service account to run ADFS under. We’ll use the unprivileged ADFSUSER account we created earlier.
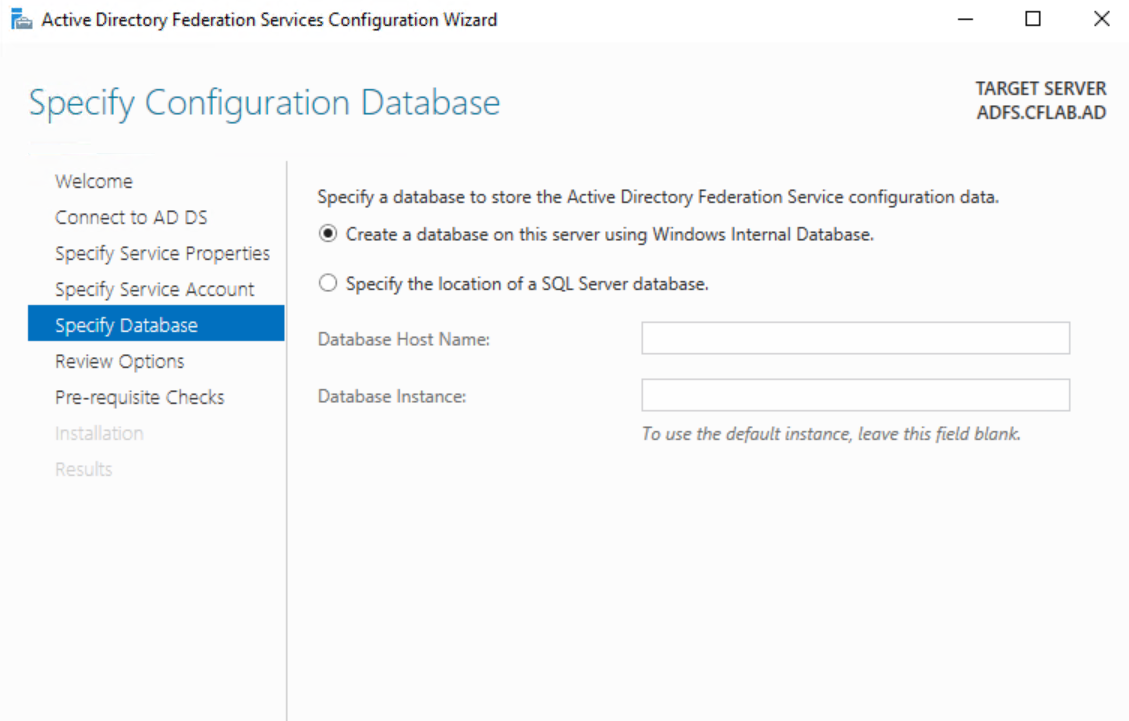
- Click ‘Next’ and on this screen specify the location where you’d like the ADFS database stored. For simplicity in this example we’ll use the first option to create the database in the Default Windows Internal DB.
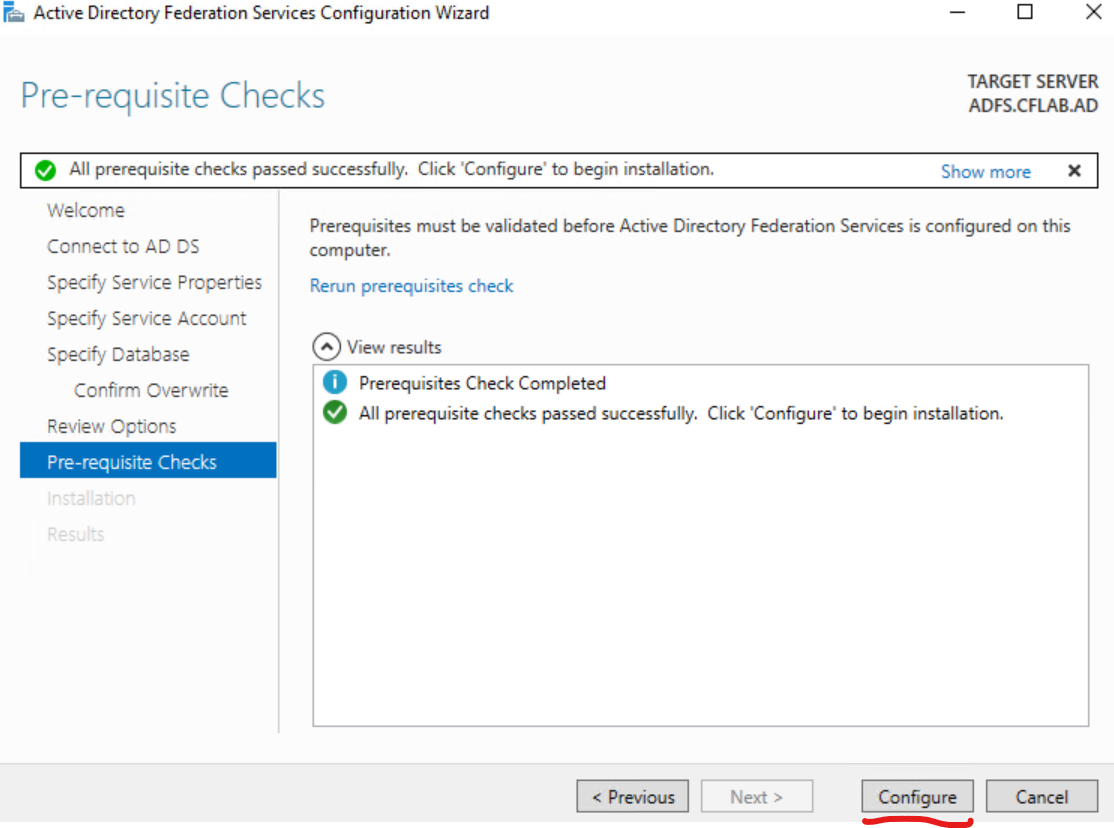
- Click ‘Next’ and Review the selected options. If it looks correct click ‘Next’ and proceed through configuration.
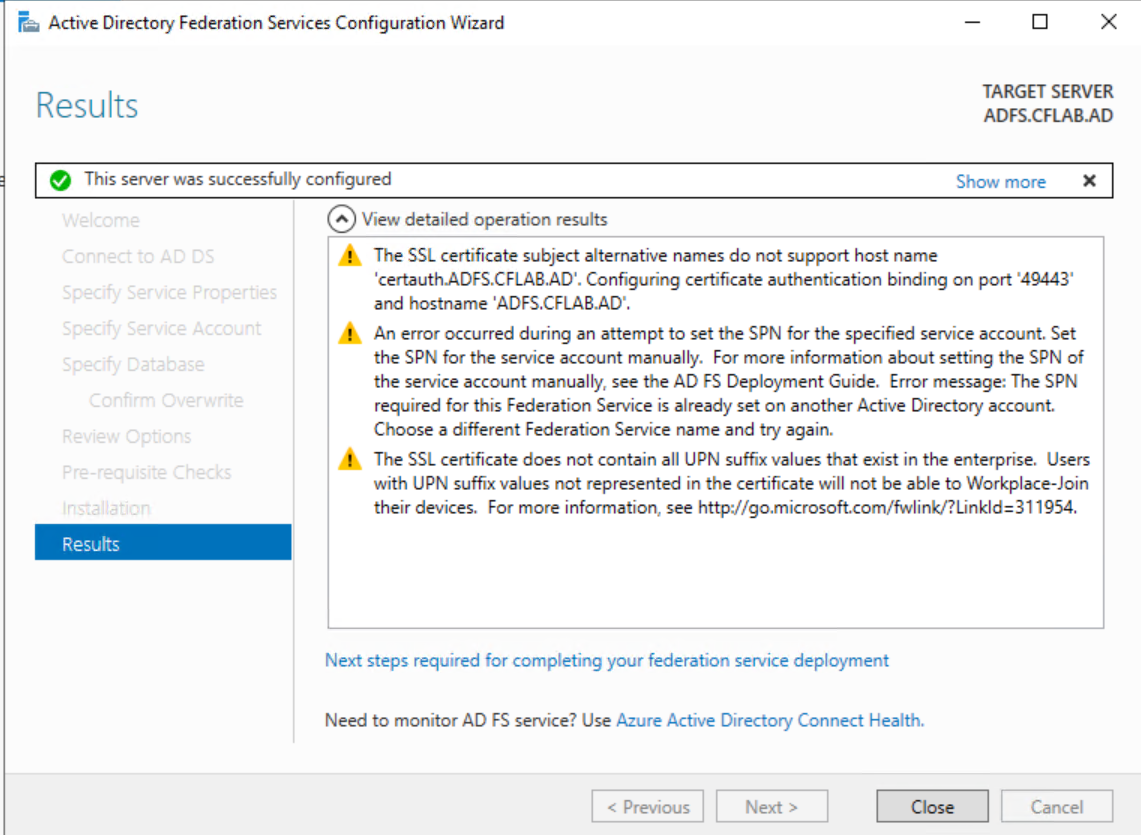
- Once configuration competes, you should get a notice that ‘this server was successfully configured’. It is normal for there to be several warning messages in the details pane as shown.
Testing ADFS
- Open PowerShell as admin.
- Run:
Get-AdfsProperties | f1 *enableidp*
Noted that it will return ‘False’:

- IDP Sign on Page must be enabled.
Run:
Set-AdfsProperties –EnableIdPInitiatedSignonPage $true
Get-AdfsProperties | f1 *enableidp*
Note that it will now return ‘True’:

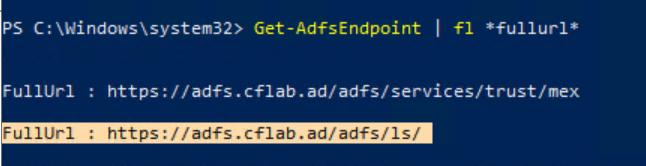
- Now we need to locate the URL for the ADFS Sign on Page.
Run:
Get-AdfsEndpoint | fl *fullurl*
This will return a series of ADFS related URLs. We’re looking for the on ending in ‘/ls/’
- Now open up a web browser and navigate to that URL located and append the following:
idpinitiatedsignonpage.aspx
So in the example the full URL we’ll navigate to is:
If everything is setup correctly you should see page similar to this:

- You can test that things are properly authenticating against your active directory by clicking ‘Sign In’. Then enter the fully qualified username followed by ‘@’ and your AD domain name, and the user’s password. For example:
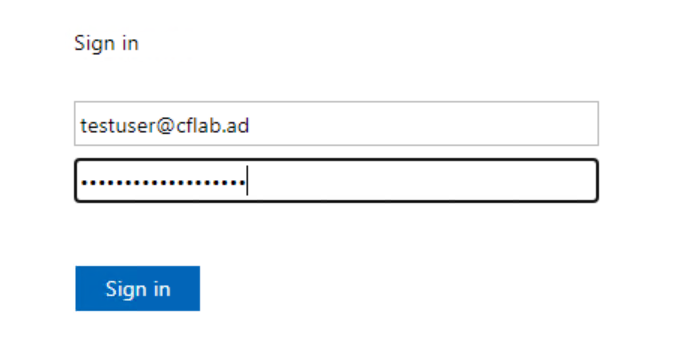
If working correctly, it should successfully sign in.

That’s it for now! We’ve successfully installed and configured a Certificate Authority and have ADFS running. Keep an eye out for part 2 where we’ll walk through how to register our GID User Management system with ADFS and get Active Directory GID Authentication up and running.