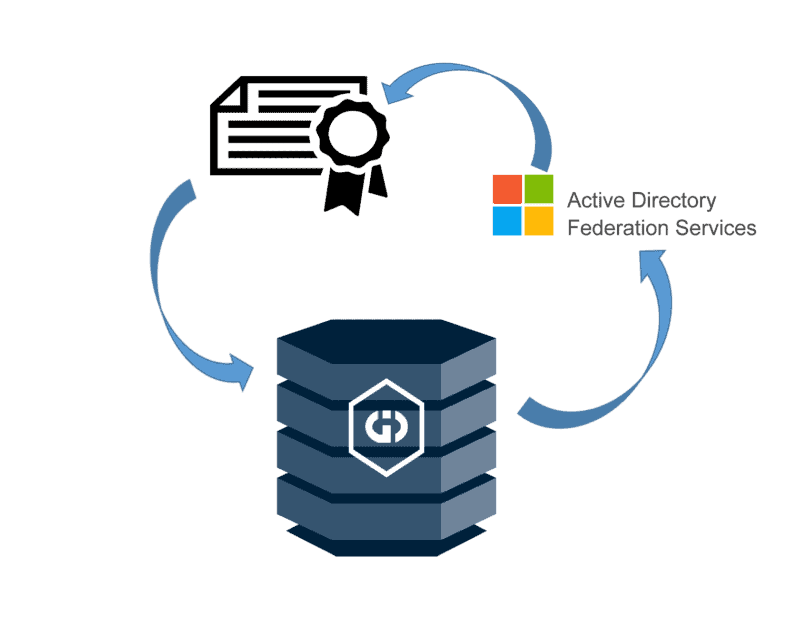
Now that we have a Certificate Authority deployed and ADFS running on our domain, we’re now ready to move onto part 2, where we’ll install the GID User Management Service, and link it to ADFS as an Authentication provider.
If you missed part 1 or need to still complete these previous steps, have a read through part 1, then come back here.
Now that ADFS is properly running on our domain, we need to install the Griffeye GID User Management application (if not already installed), and link the User Manager to our newly created ADFS.
We’ll assume that you already have a ‘Griffeye Standalone GID’ installed, populated and functioning on your domain’s network. If not, please install the Standalone GID on whatever endpoint it will be running on before proceeding to the next step.
GID User Management Install
If user management is already installed and configured with baseline local user management, you may skip to ‘GID User Management Active Directory Configuration ‘.
- Logon to your server that the GID is running on using a user account with local administrative access.
- Open the Windows ‘Services’ console, locate ‘Griffeye Intelligence Database’, right-click, and stop the service.
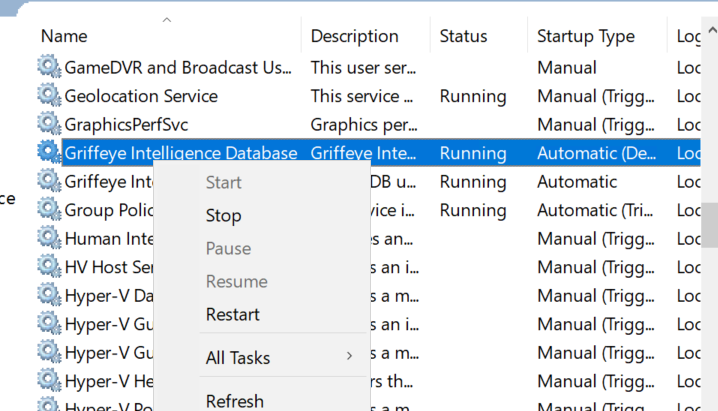
- Install the ‘Griffeye Intelligence Database User Management’ application version 1.1.1 or higher.

- After installation is complete, check the Windows ‘Services’ console again and ensure the Griffeye Intelligence Database services, and User Management are both running.

- Open a browser and navigate to:
If properly installed you should reach a page that looks like this:
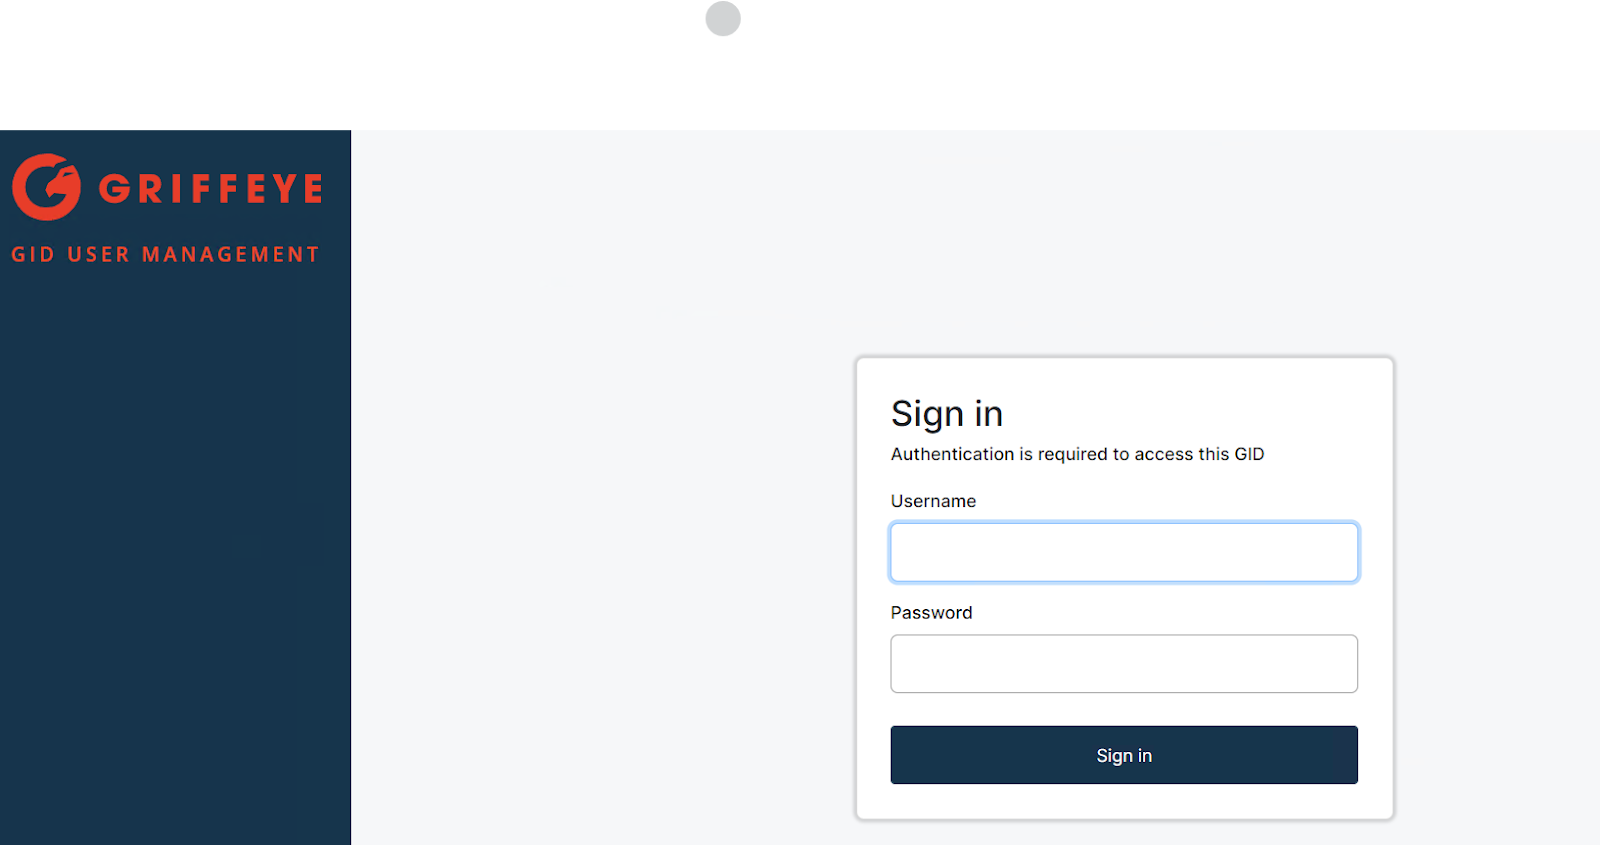
- Login using the default credentials of:
Administrator
Password
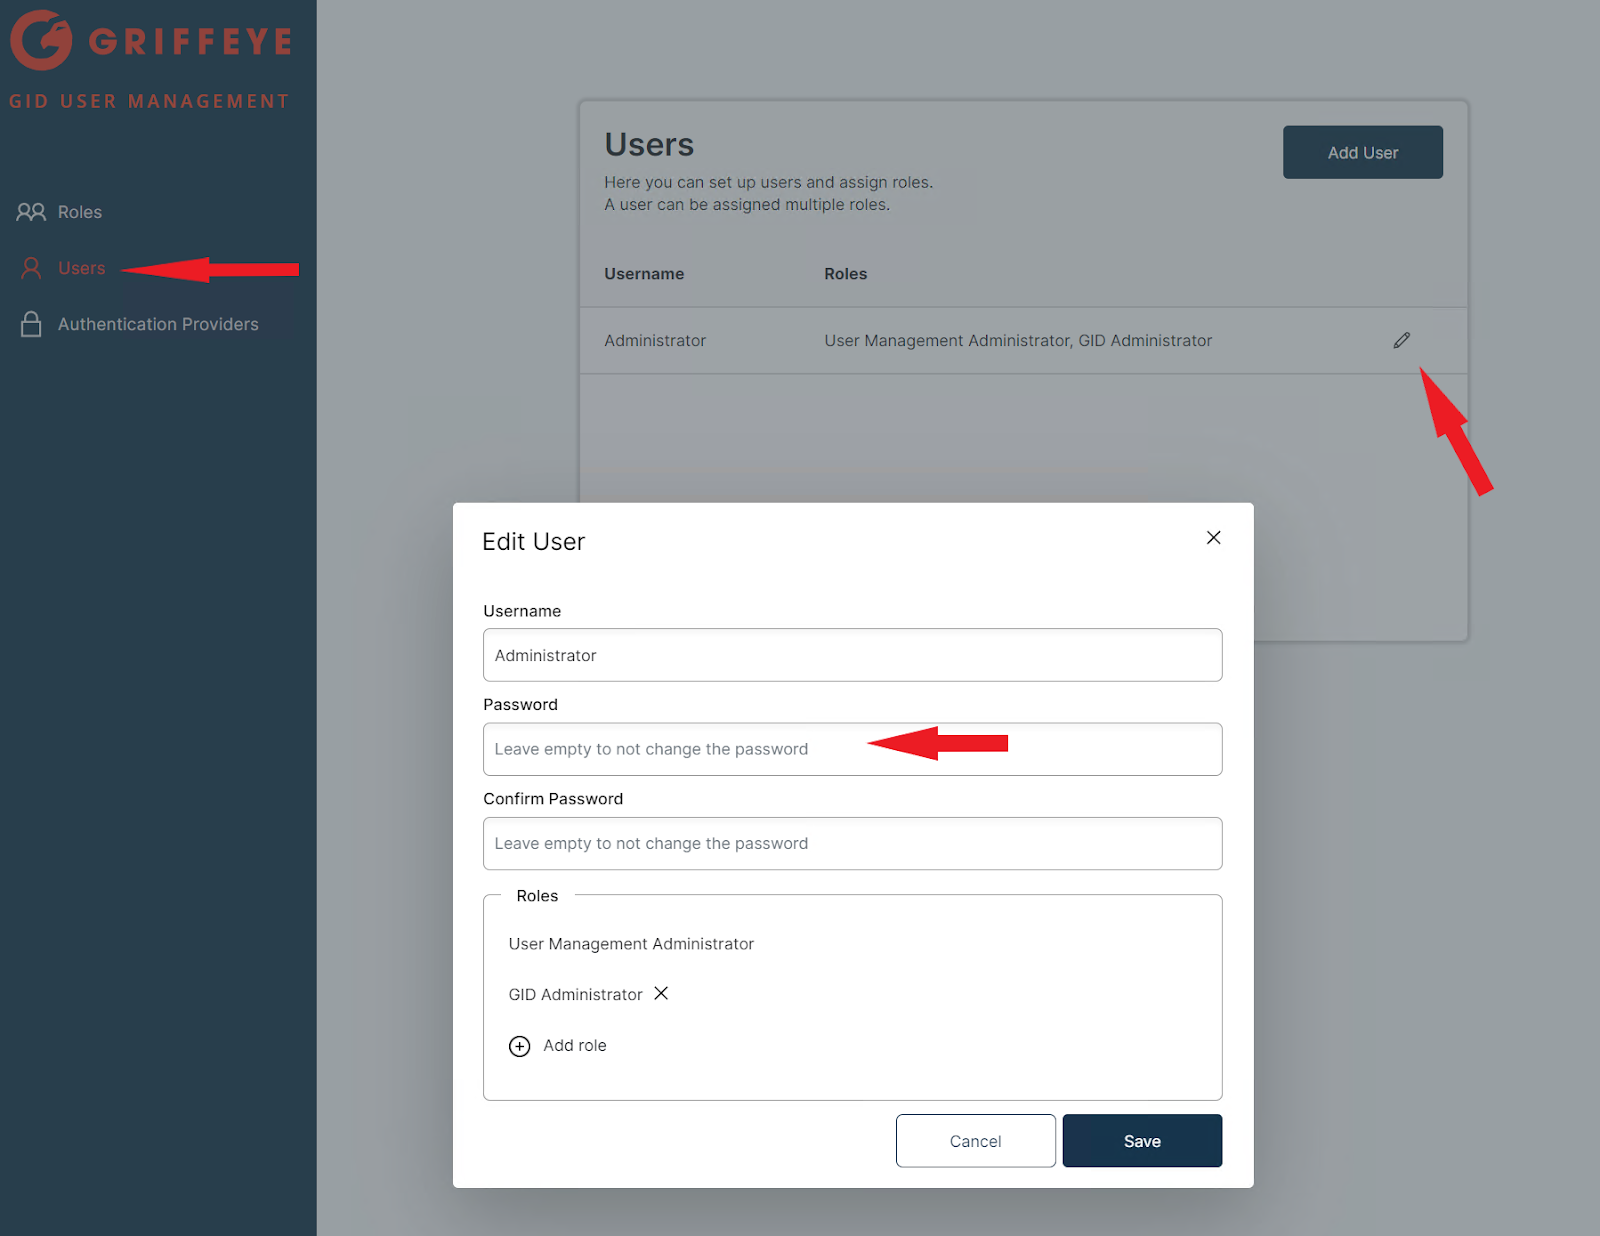
- First go to the ‘User’ menu, select the pencil icon next to ‘administrator’ account, and set a new unique password for the administrator account.
- Next it is recommended to attempt to conduct a test connection to the GID using these credentials via the Analyze DI GID Management interface. Remember when adding the GID within Griffeye Analyze to use the URL syntax of:
You should be prompted on the first connection attempt to accept installation of the GID’s self-signed SSL certificate, followed by being forwarded to a web-based login where you’ll enter the GID Administrator credentials you just set. If everything is correct, you’ll get a notice saying you are logged in and that the webpage can be closed. The Griffeye Analyze DI GID Management interface should also be updated reflecting you are logged in, and the GID should be connected reflecting any source information available in the GID.
GID User Management Active Directory Configuration
We’re now ready to register the GID User Manager in ADFS for unified domain user management within the GID.
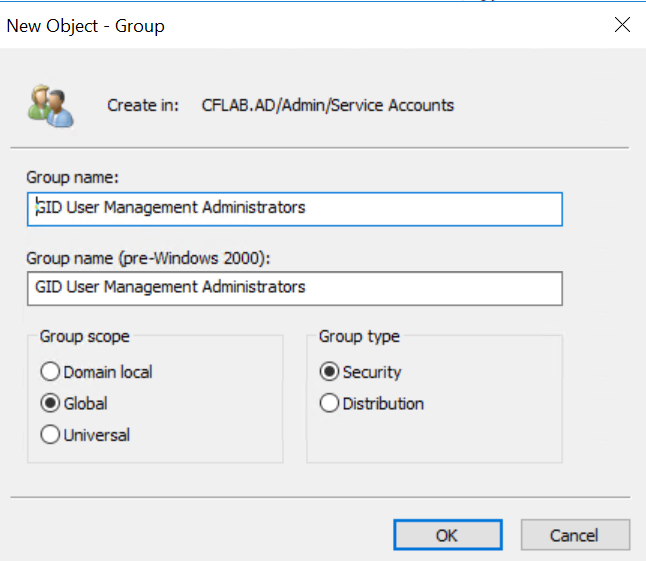
- We first need to create a group with Active Directory that we’ll call ‘GID User Management Administrators’. You’ll need to access your domain controller, and domain user interface and create this group.
- Next open PowerShell on the domain controller and run:
Get-ADGroup -Identity ‘GID User Management Administrators’
This should return:
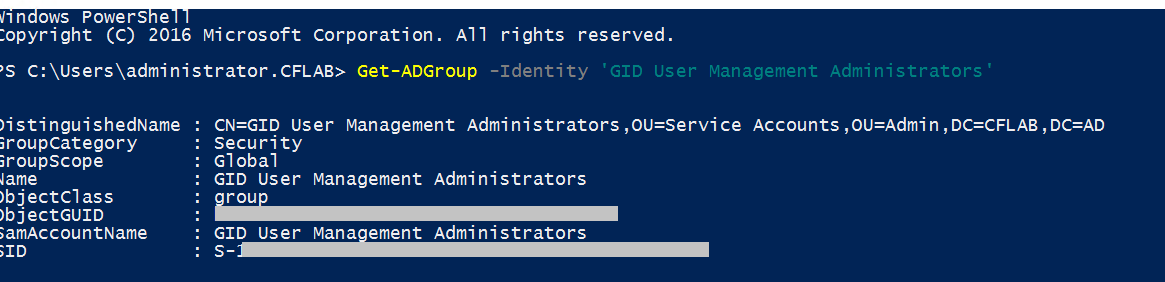
We need to note the SID for this user group and hold onto it for later.
- From the GID User Management web portal click on ‘Authentication Providers’, followed by ‘Add’.
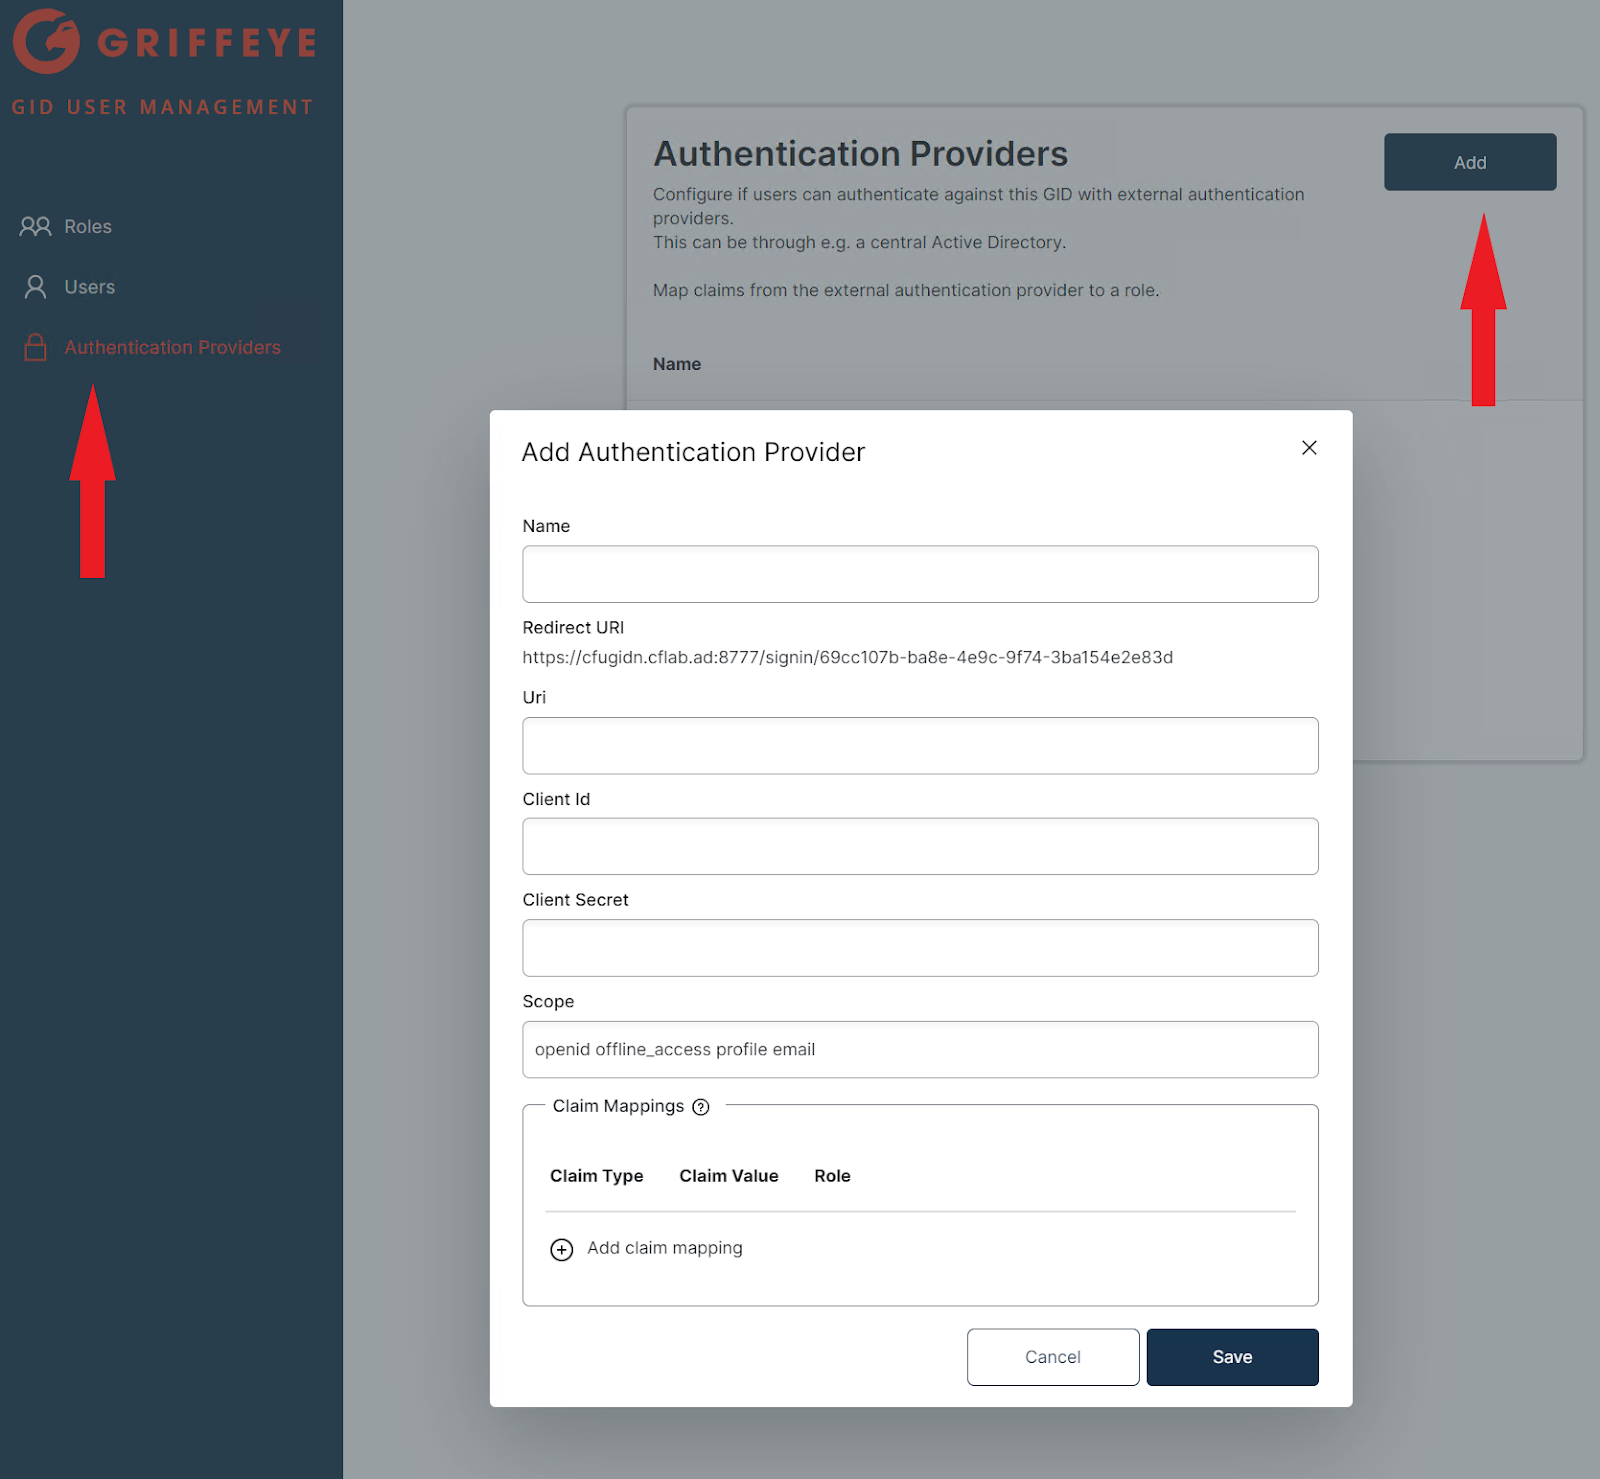
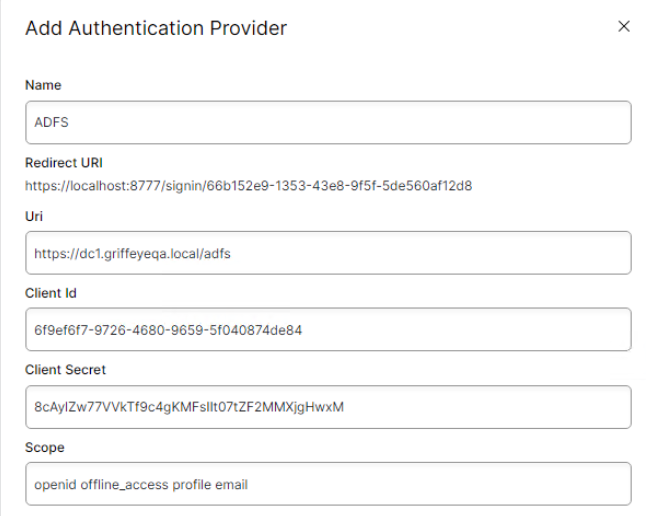
- Provide a name for the provider, we’ll use ‘CFLAB ADFS’ in this example, and copy the ‘Redirect Uri’ for the next step.
- Locate and copy the script ‘Add-GidAdfsRegistration.ps1’ which is located in the GID user managements installation folder at ‘C:\Program Files\Griffeye Technologies\GID User Management\’.
- Now return to the server we installed and configured ADFS on previously, and copy the ‘Add-GidAdfsRegistration.ps1’ script to the ADFS server. In the following example I’ve copied the script to the ‘adfservice‘ user’s ‘Desktop‘.
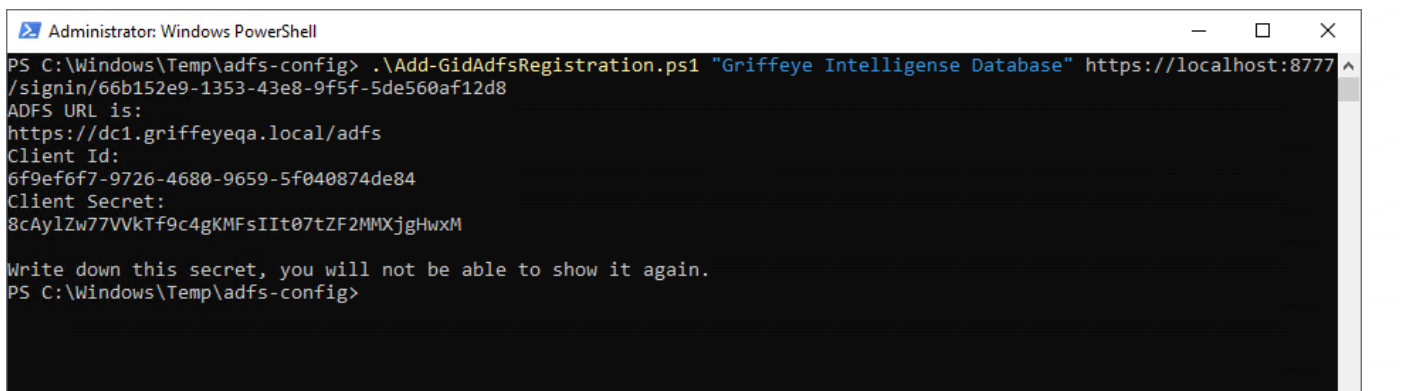
- Using an Administrative PowerShell window run the following script and append the Redirect URI from step 4 as shown in following screenshots:
Add-GidAdfsRegistration.ps1 “Griffeye Intelligence Database” https://[GIDHOSTNAME]:8777/signin/[REDIRECTURI]

- This will return a unique Client Id and Client Secret which you will take and enter into the remainder of the ‘Add Authentication Provider’ window similar to the examples below:
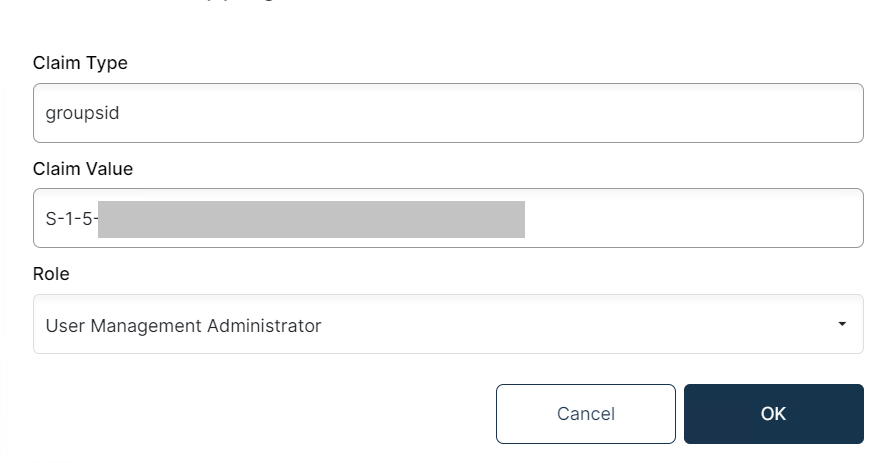
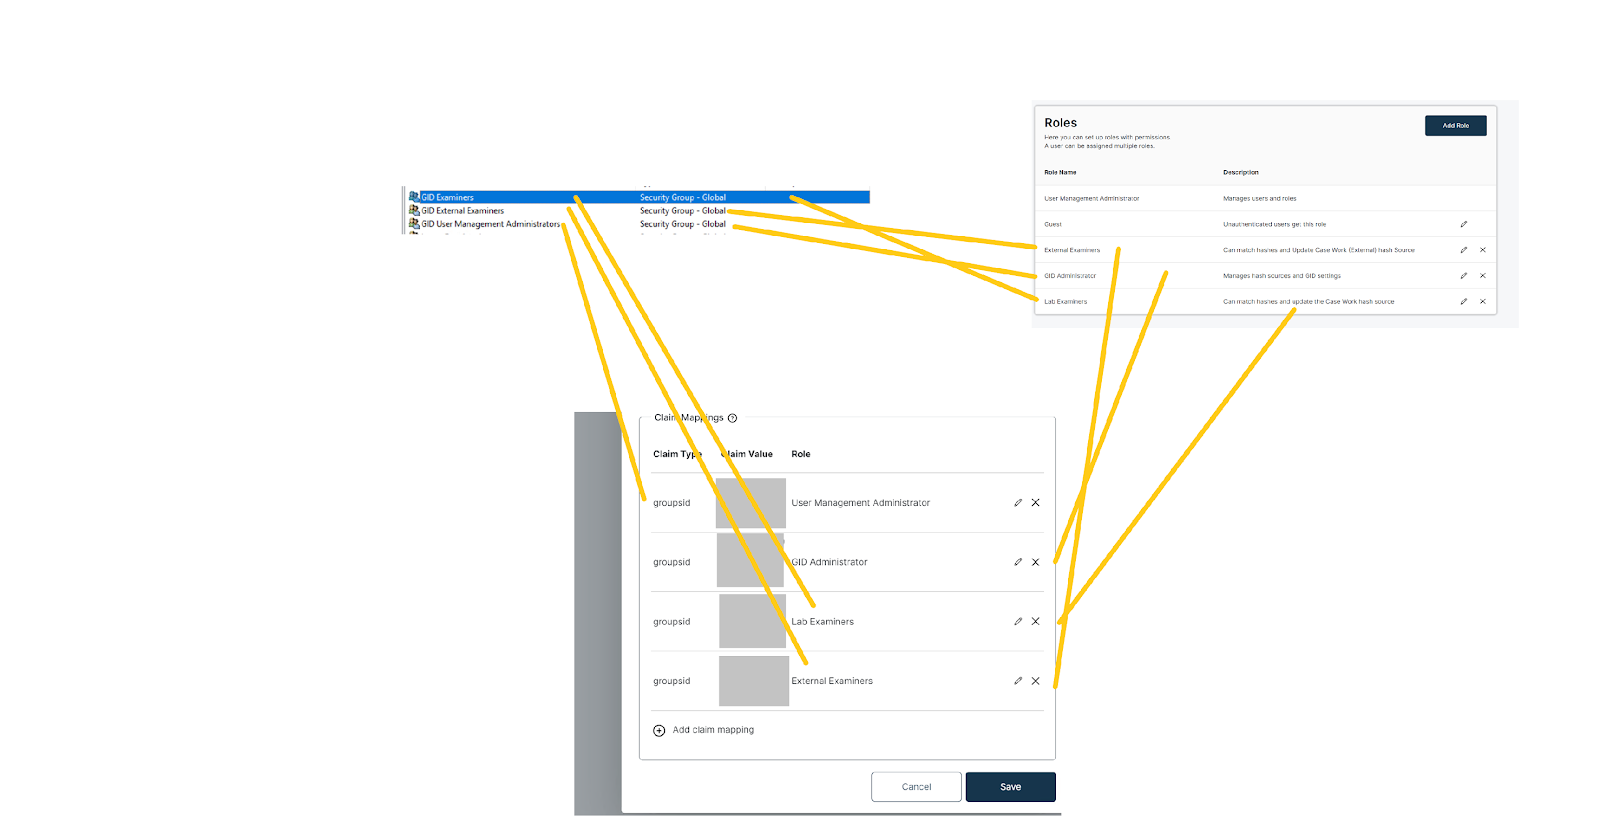
- Finally click ‘Add claim mapping’ and enter a new claim using the User Management Group you created in step 1, and the SID you identified in step 2. Enter ‘groupsid’ in the ‘Claim Type’ box, and select ‘User Management Administrator’ from the ‘Role’ dropdown. Click ‘Save’ once all fields are completed.
- Next go to the Windows ‘Services’ on the GID Server and restart the ‘Griffeye Intelligence Database User Management’ service.
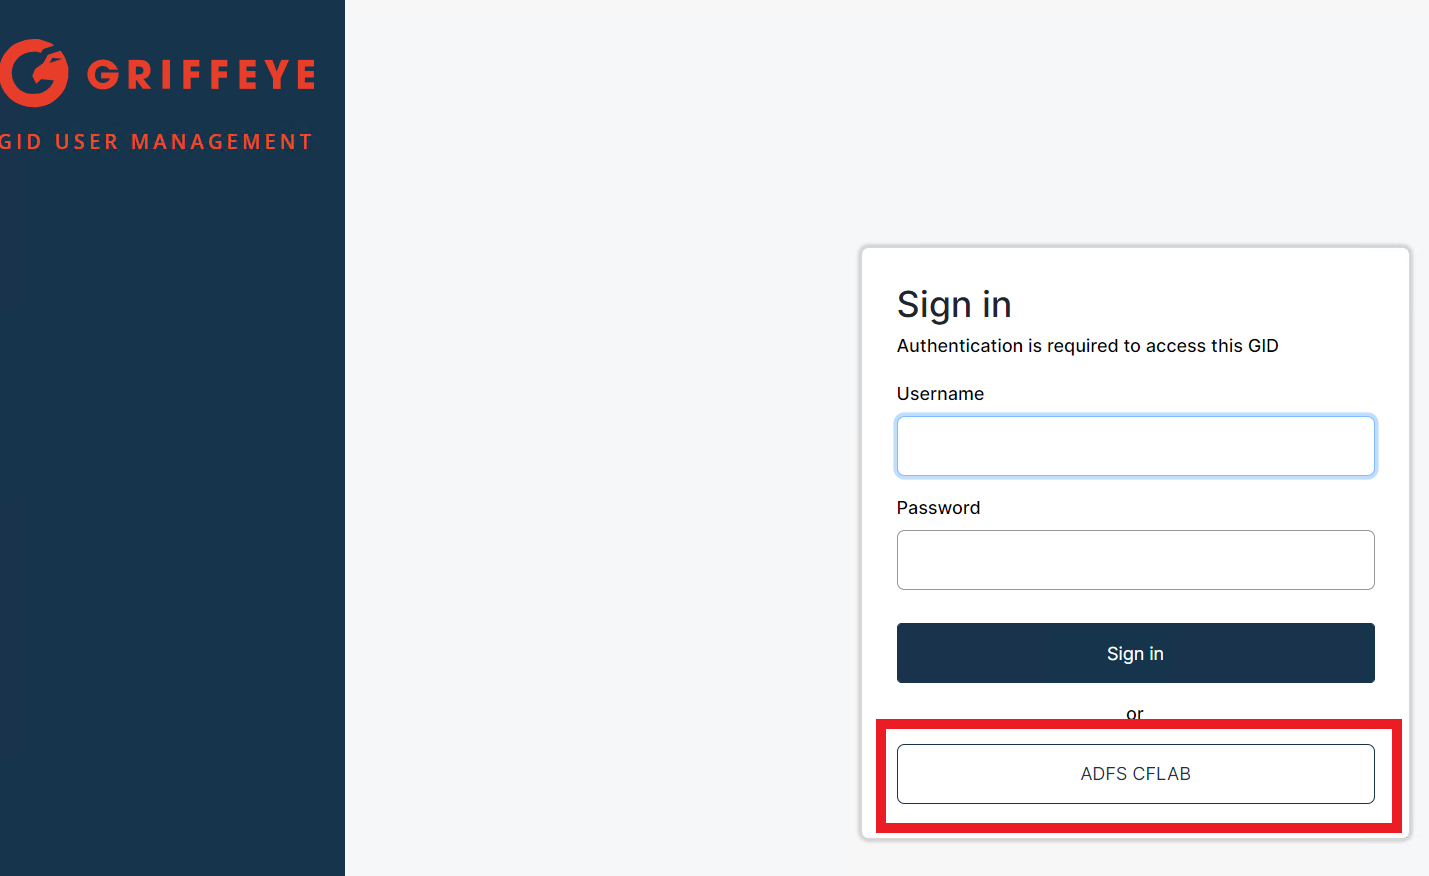
- After restarting, navigate back to the login screen for the GID User Management web portal and note a new login option. All GID users will now use this new ADFS login in the future when authenticating to your GID:
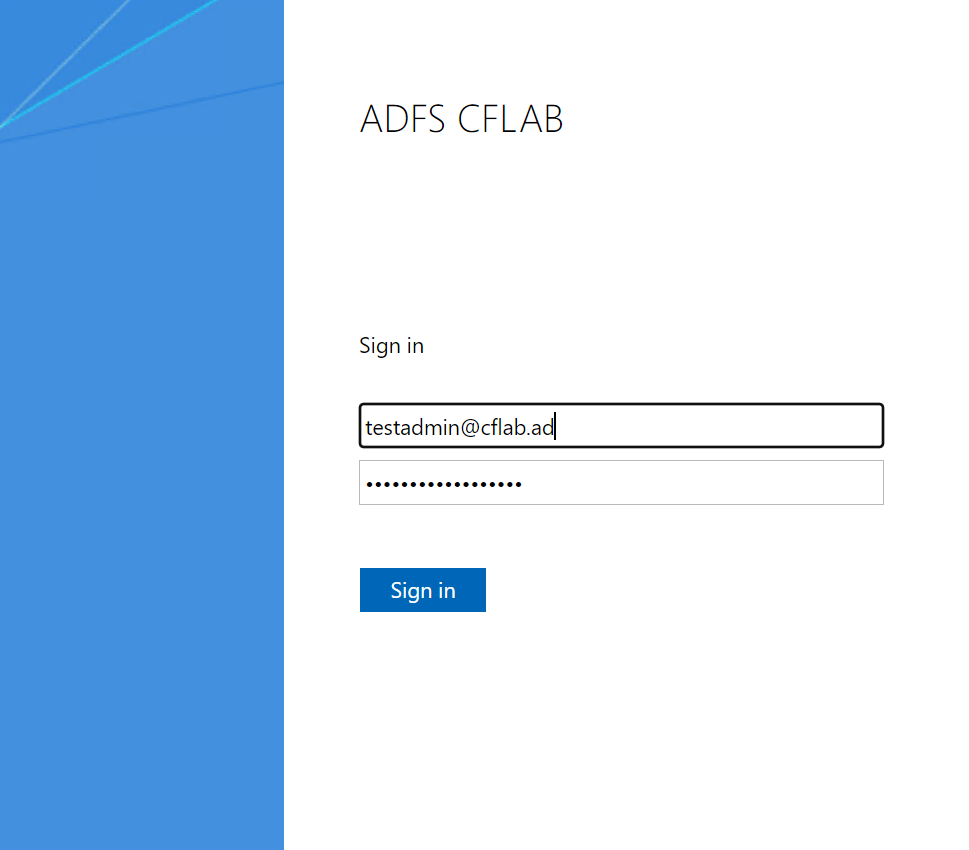
- This will redirect you to the ADFS authentication page we saw earlier during the ADFS installation and testing process. Here we can now login using any Active Directory user account that belongs to the Active Directory user group, ‘GID User Management Administrators’. Any users you’d like to belong to this group can be easily added using the Active Directory User Management interface on your domain controller.
- Now you’ve configured the ADFS server as an authentication provider. You can expand the number of roles mapped between Active Directory Groups and Claim Mappings in the GID User Manager allowing for different groups to have varying permissions on a given GID. Just go back into the GID User Manager ‘Authentication Providers’ webpage, click the edit ‘pencil’ button next to your existing ADFS connection, and start adding additional claim mappings.
After that you’re all set. When users are prompted to authenticate to a GID secured using ADFS Active Directory, they’ll just use the ADFS Login button when the login page opens.
The Griffeye GID ad ADFS are now configured for use within a local domain network.
Now that this is setup, we have some additional options and configurations needed if you want to open your GID up for remote access, outside of your local network. There’s a lot of ways that you can do this, all of which have a variety of pros/cons and security considerations.
Some of those options may require some additional tweaking of the GID User Management settings and ADFS, while others may not.
In a future post, I’ll discuss some of these options and the varying implications you may want to consider if you’re wanting to explore external access.